Showing posts with label Very Many. Show all posts

Wednesday, 26 May 2021

Beautiful


This tutorial was written by Mizteeque on 26th May 2021, and assumes a working knowledge of psp.
Any similarity to other works is unintentional and purely coincidental


Supplies Needed:
Tube of choice - I am using the gorgeous artwork of Very Many
which can be purchased from the store HERE
Font of choice
Wordart (right click and save - It will save as original size)


•••

open blank canvas 610 x 240

floodfill with gradient made from 
#f6d9eb & #e2b7ef
angle 36, repeats 2

c/p close up tube, move to right side
blend mode overlay

c/p regular tube, position face in middle
duplicate - gaussian blur, 5
blend mode screen

paste regular tube again, resize 60
mirror, position on the left side
blend mode overlay

layers - arrange - move down
repeat (so its under your main tube in the middle)

duplicate
mirror
move to bottom right corner

duplicate
mirror
resize 60
blend mode burn

duplicate (last time!)
layers - arrange - bring to top
move to the right so its over the eye of the close up tube

freehand selection tool, feather 25
select around the bottom half of the tube and hit delete a couple of times
so just the face is left, showing over the eye of the close up
If you dont like the look of it like that, you can then move 
the close up tube slightly more to the right

Merge visible

c/p wordart, position to left

add name, license, & copyright information

merge all (flatten)

image - add borders - white, 5
select all, contract 5, invert
add noise to your liking

select none
save as jpg 


Saturday, 5 December 2020

Christmas Joy


This tutorial was written by Mizteeque on 5th December 2020, and assumes a working knowledge of psp
Any similarity to other works is unintentional and purely coincidental.


Supplies needed:
tube of choice - I am using the beautiful artwork of  VeryMany
which can be purchased from the store Very Many Tubes
Scrapkit - As The Wind Blows from Horseplays Pasture
My frame (save from bottom of post)
Mask of choice
Font of choice

•••
Open blank canvas 700 x 700
floodfill white

c/p paper 15, apply mask
c/p frame, resize 30
c/p the following elements under the frame layer
elements 12, 46, 61, 18, 22, 21 - all resized by 50
duplicate, mirror, flip, rotate as you see fit
and make a cluster of the elements around the frame
dropshadow all elements

Make frame active
magic wand, click inside the frame, expand by 5
click delete on each element layer
invert selection

c/p tube close up as new layer just under the frame layer
resize as necessary, position to the left side of the frame
delete
deselect
change blend mode to hard light
duplicate, adjust blur, gaussian blur 8, change blend mode to screen


c/p full tube above frame layer
resize as necessary

elements 18, 19, 26, 34, 37, 38, 66, 
(and anything else you would like to use)
resized appropriately and position along the bottom of
the tag to your liking

dropshadow all elements

add some wordart if you wish

add name, license and copyright information
delete white background layer
merge visible
crop and save as png

(click to open full size and save)

Sunday, 19 April 2020

Forest Elf


This tutorial was written by Mizteeque on 20th February 2020, and assumes a working knowledge of psp.
Any similarity to other works is unintentional and purely coincidental.

~~~~~~~~~~~~~~~~~~~~~~~~~~~~~~~~


Supplies needed:

Tube of choice - I am using the beautiful "Forest Elf 3" from Very Many
Font of Choice
My supplies HERE

Filters
 L en K Zitah HERE
Graphics Plus HERE


Open blank canvas 700 x 500
floodfill with gradient made from 2 colors from your tube
new raster layer
floodfill white
apply mask
merge group
merge visible
copy

open blank canvas 700 x 250
floodfill with gradient
paste as new layer, change blend mode to luminance legacy
effects - graphics plus - horizontal mirror default settings
Merge Visible
copy and paste shape as new layer
select all, float, defloat, 
on raster 2, promote selection to layer
deselect
delete shape layer

on promoted layer
effects - L en K Zitah, 5,10,0,60,60,60,0,30

copy and paste misted image

copy and paste tube as new layer
resize and position to your likeing

new raster layer, floodfill with gradient
select all, contract by 3
delete
apply favourite bevel

add name, license & copyright information

merge all
save as jpg

Sunday, 23 February 2020

Steamin' Along


This tutorial was written by Mizteeque on 3rd January 2020, and assumes a working knowledge of psp.
Any similarity to other works is unintentional and purely coincidental.

~~~~~~~~~~~~~~~~~~~~~~~~~~~~~~~~


Supplies needed:

Tube of choice - I am using 'Steampunk 7' from VeryMany
Scrapkit - 'Steamin Along' from Tagcatz Design (8th kit down)
Mask 6 from Fecnikek Valentine pack
Font of choice


Open blank canvas 700 x 700
floodfill white

c/p paper 4
apply mask
merge group

select all, float, defloat, invert
c/p el 11
hit delete
deselect
change blend mode to overlay

el 29, move down below the mask layer
and down the canvas a little so its showing 
just under the mask a tiny bit

frame 3, resize 40, top right corner

el 39, resize 30, top left corner

el 28, resize 30, position on bottom of frame 3, 

el 34, resize 30, layers - arrange - move down, repeat
image effects - offset - H-134, V26
duplicate, offset - H110, V-168

el27, resize 20, offset - H78, V-122

c/p tube under frame, resize to fit
erase any that is showing outside the frame
change blend mode to overlay

paste tube again, bring to top of layer palette
resize to fit, erase the bottom of the tube if necessary 
so its not overhanging the bottom of the tag.

el 28, resize 40, rotate right 90, position at bottom of tube

el 47, resize 20, bottom left of tube

el 26, resize 15, bottom right of tube

el 25, resize 15, place in front of previous element

add another other elements you like

add name, license & copyright information
delete white background
merge visible

crop and save as png


Tuesday, 31 December 2019

Slats


This tutorial was written by Mizteeque on 10th December 2019, and assumes a working knowledge of psp.
Any similarity to other works is unintentional and purely coincidental.


Supplies needed:

Tube of choice - I am using "Forest Elf 3" from Very Many
which can be purchased from the store HERE
Christmas Cluster HERE
Mask of choice
Font of choice
pinkrec - save from bottom of post


open blank canvas 700 x 700
floodfill white

c/p tube
effects, muras meister, wallpaper rotate, default settings
adjust, blur, motion blur, angle 130, strength 100
apply mask, 
merge group

c/p cluster, resize 60
c/p tube again, resize 40, drag under the cluster
freehand selection tool, feather 22, select around the bottom 
of the tube hit delete 2 or 3 times
deselect
merge tube and cluster layers together

copy merged, paste as new layer, mirror
c/p large tube once more
merge down
c/p rectangles, select all, float, defloat, invert
hit delete on the merged layer, deselect
apply your favourite inner bevel
drag down to just above mask layer, move to the left

duplicate bevelled rectangles, adjust blur, gaussian blur 5
layers - arrange - move down
change blend mode to dissolve
dropshadow rectangles layer

add name, license and copyright information
delete white background layer
crop and save as png


click to open full size and save


Here are some more examples made by members of my forum 

By Prismatic

By Deeva


By Wendy


Saturday, 7 December 2019

Pink Christmas


This tutorial was written by Mizteeque on 24th November 2019, and assumes a working knowledge of psp.
Any similarity to other works is unintentional and purely coincidental.

~~~~~~~~~~~~~~~~~~~~~~~~~~~~~~~~


Supplies needed:

Tube of choice - I am using "White Elf 2" by Very Many
which you can purchase from the store HERE
My supplies HERE
Mask of choice
Font of Choice


open blank canvas 700 x 700
floodfill white

c/p paper
apply mask
merge group
duplicate
merge down

c/p wreath, resize 15
c/p frame, resize 25
c/p tube, resize as necessary, erase any that is showing below the frame
c/p tree, resize 50, position bottom right 
c/p gifts, resize 40, position bottom left
c/p NOEL, resize 20, place in front of gifts
c/p pink tree, resize 60, position in front of first tree but to the left a little 
c/p pink deer, position middle bottom
c/p baubles, position in front of pink deer
c/p pink cones, place next to the baubles
c/p wordart

add name, license and copyright information
delete white background layer
merge visible
crop and save as png


Here are some more examples made by the member so of my forum

by Linda

By Wendy

By Waltraud

By Chillybean

By Gigi


Sunday, 11 August 2019

Delicate Elf


This tutorial was written by Mizteeque on 30th June 2019, and assumes a working knowledge of psp.
Any similarity to other works is unintentional and purely coincidental.

Supplies Needed:

Tube of choice - I am using the beautiful Forest Elf 5 by Very Many
My Scrapkit - Tenderness
Vintage Stamps from Minja's Designs
My "Delicate" wordart HERE (2nd down on the left)
Font of choice


open blank canvas 700 x 700
floodfill white

c/p stamp 1, resize 20
image effects, offset, H-55, V-40

c/p stamp 2, resize 20
image effects, offset, H55, V40

merge down
select all, float, defloat
c/p paper 2
invert
delete
keep selected
c/p close up tube as new layer
delete
keep selected
change blend mode to screen

c/p paste smaller tube as new layer
position to the left
erase the tube along the bottom left corner
deselect
d/s

delete original stamp layer

el 34, resize 80, position beneath the large 'screen' tube layer
el 19, resize 80, layers, arrange, bring to top, position along bottom of small tube
duplicate, rotate right 90, position along back of small tube,
layers, arrange, move down, repeat
el 46, resize 60, move slightly to the left behind the tube

c/p white wordart as top layer, resize 50, position to your liking
duplicate, merge down

(I duplicated again, resized 60, placed it under my tube and to the right
a little, erasing the part that was overhanging the edge of the tag)

add name, license and copyright information
delete white background layer
merge visible
crop and save as png

Like Clockwork


This tutorial was written by Mizteeque on 8th May 2019, and assumes a working knowledge of psp.
Any similarity to other works is unintentional and purely coincidental.


Supplies needed

Tube of choice - I am using 'Steampunk_23' from Very Many
which you can purchase from the store HERE
Scrapkit - Like Clockwork HERE
Stamp 2 from Minja's Designs HERE
Font of choice

Open blank canvas 700 x 700
floodfill white
c/p paper 11 
c/p stamp 2 - resize 25 - select all, float, defloat, invert
on paper layer, hit delete, deselect, delete stamp layer
duplicate pink layer, merge down
duplicate, rotate left 90
selection tool, circle, feather 30, draw out a circle from the middle of your canvas
invert selection, hit delete on your keyboard once, deselect
move down towards the bottom

c/p tube - resize to fit - blend mode luminance legacy
duplicate tube, 
adjust blur, gaussian blur 10, 
blend mode screen, lower opacity to 75
dropshadow original tube layer

Dont forget to dropshadow elements as you go along

el 45 - resize 55 - position along bottom of tube
el 39 - resize 40 - position along bottom of tube in front of flowers
el 38 - resize 60 - position centrally behind tube
el 49 - resize 30 - position behind the cogs to the left, duplicate, mirror and move down a little
el 57 - resize 30 - position bottom right, place on top of cogs, behind tubes back to the right
duplicate, layers - arrange, bring to top, mirror and position bottom right of tag
el 67 - resize 30 - position bottom right
el 72 - resize 20 - position behind car
el 12 - resize 25 - position bottom left

add any other elements you wish

add name, copyright and license information
delete white background layer
merge visible
crop and save as png

add name, license and copyright information
delete white background
merge visible
crop and save as png

Thursday, 1 August 2019

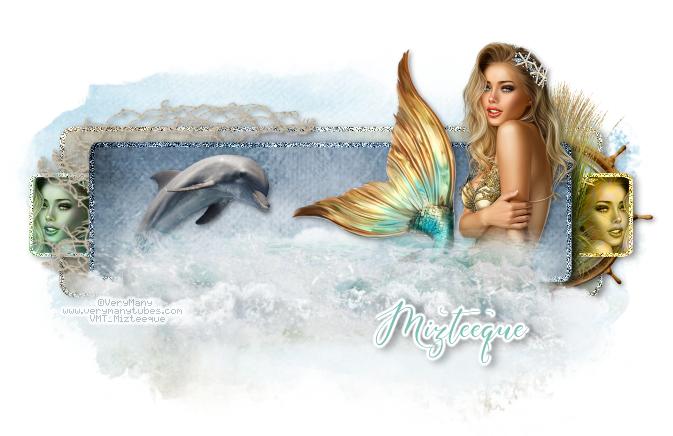
Mermaid

This tutorial was written by Mizteeque on 20th June 2019, and assumes a working knowledge of psp.
Any similarity to other works is unintentional and purely coincidental.

Supplies needed:

tube of choice - I am using the beautiful mermaid4 from VeryMany
which can be purchased from the store HERE
my supplies HERE
my scrapkit -Coastal HERE
Mask of choice
font of choice


Open template from supplies
shift & D to duplicate and close original

c/p paper 12 just above bg layer
apply mask
merge group

layer 1 - select all, float, defloat, c/p paper 16
invert - delete - invert - selections, modify, select selection borders
inside 5
add noise - gaussian 86 - deselect

Layer 2 - repeat using paper 18

Layer 3 - repeat using paper 8

elements 62 & 63
element 64 - resize 60
position along bottom of top layer to your liking

element 31 - resize 30 - rotate left 90
drag down layer palette to just under the top paper layer
position to the left - dropshadow

element 51 - resize 30 - position to the right 

element 30 - resize 50 - erase one of the dolphins
position to your liking between the water layers

c/p tube - resize as necessary
using your freehand selection tool, feather around 20/25
select along the bottom of your tube and hit delete a few times
deselect

duplicate tube twice - mirror one
drag then both down to just above the middle paper layer
on paper layer - select all, float, defloat, contract by 4, invert
position tubes to your liking within the selection, hit delete on each one
deselect
change blend mode to luminance legacy on both.

frame 2 - resize 30 - position just above bottom paper layer
to the right behind the grass

add name, license and copyright information
delete white bg layer
merge visible
crop and save as png

Monday, 4 March 2019

Your Smile


This tutorial was written by Mizteeque on 18th February 2019 and assumes a working knowledge of psp.
Any similarity to other works is unintentional and purely coincidental


~~~~~~~~~~~~~~~~~~~~~~~~~~~~~~~~

Tube of choice I am using the beautiful artwork of VeryMany which
can be purchased from the store HERE
I used 2 close ups and one smaller tube
My supplies HERE
Font of choice
Penta.com - Vtr2


Open blank canvas 700 x 300
c/p texture

c/p 2 close up images of your choice
position one either side of the canvas
lower opacity of both to around 44
and change blend mode to overlay on both

(Note: as you go along you may find you want to duplicate the texture layer,
erase, rotate, mirror etc to get the look you like.  I actually duplicated it about
4 times and erased parts until I achieved the look I wanted)


c/p small tube (resize if necessary)
position right in the middle
duplicate
adjust - blur - gaussian blur 13
change blend mode to overlay 
lower opacity to around 70
dropshadow original tube layer

c/p word art
position to the left a little
change blend mode to dodge
duplicate, change blend mode to screen

c/p sparkles
drag down layer palette to just above your texture layer

merge visible
duplicate
adjust - blur - gaussian blur 13
effects - penta.com - vtr2 default settings
change blend mode to screen
lower opacity between 50 - 60

c/p sparkles again, mirror and move to the right slightly

c/p texture once again
new raster layer
select all, image, crop to selection

On texture layer
select all, contract by 5
delete
deselect

adjust - add noise - gaussian 34, monochrome
magic wand, click inside the frame you just made
floodfill black, contract 1, delete
deselect
dropshadow your frame

add name, license and copyright information
merge all flatten
save as jpg


To make matching avatar

custom selection 
top & left 0
bottom and right 175
edit selection
move to a place of your liking on the banner
edit selection 
copy
deselect

paste as new image
make a frame for it as you did on the banner
add name, license and cr
merge all
save as jpg

Saturday, 26 January 2019

Crowning Love


This tutorial was written by Mizteeque on 26th January 2019 and assumes a working knowledge of psp
Written using psp9 but other versions should work just as well
Any similarity to other works is unintentional and purely coincidental

~~~~~~~~~~~~~~~~~~~~~~~~~~

Tube of choice, I am using the stunning artwork of VeryMany 
which you can purchase from her store HERE
Scrapkit - Dear Valentine by Verena Designs
(I have had this kit in my files for the longest time and cannot find where it can now be purchased)
Mask 1 from MaskSet31 by Rachel Designs
Font of choice

~~~~~~~~~~~~~

Open blank canvas 700 x 700
floodfill white

c/p tube 
effects - muras meister, copies - wallpaper rotate - default settings
adjust - blur - motion blur - angle 135, strength 100
repeat blur
apply mask
merge group

elements 05, 09, 14, 23, 24, 32, 36, 40, 41 & 55

c/p all elements on to canvas
resize and position to your liking
use my tag as a reference if you wish

c/p tube, above the frame
resize as necessary
erase any that is showing outside the frame

add name, copyright and license information
delete white background layer
crop and save as png

I also made a matching avatar for mine


Friday, 4 January 2019

Princess Castle


This tutorial was written by Mizteeque on 4th January 2019 and assumes a working knowledge of psp
Written using psp9 but other versions should work just as well
Any similarity to other works is unintentional and purely coincidental

~~~~~~~~~~~~~~~~~~~~~~~~~~

Tube of choice, I am using the stunning artwork of VeryMany 
which you can purchase from her store HERE
Scrapkit - Forest Fairy by Pink Paradox Productions
Mask 044 from Vivienne's Paintbox
Font of choice

~~~~~~~~~~~~~

Open blank canvas 700 x 700
floodfill white

new raster layer
select all
paste paper 7 into selection
deselect
apply mask
merge group
resize 90

Dropshadow as you go 2,5,40,10,black

element 55, resize 40
element 122, resize 50, mirror, position behind castle
paste tube on top, resize 30
element 65, resize 40, position under tube just poking out the bottom
element 47, resize 30, position to right of tube
element 25, resize 20, position at bottom of mailbox
element 40, resize 30, position left of tube
element 35, resize 20, position on top of skirt to the left
add another other elements you wish and rearrange layers to suit
Add name, copyright & license information
delete white background
Merge visible
Crop and save as png


Elven Arch


This tutorial was written by Mizteeque on 4th January 2019 and assumes a working knowledge of psp
Written using psp9 but other versions should work just as well
Any similarity to other works is unintentional and purely coincidental

~~~~~~~~~~~~~~~~~~~~~~~

Tube of choice, I am using the stunning artwork of VeryMany 
which you can purchase from her store HERE
Scrapkit - Forest Fairy by Pink Paradox Productions
Mask 041 from Vivienne's Paintbox
Font of choice

~~~~~~~~~~~~~

Open blank canvas 750 x 750
floodfill white

new raster layer
select all
paste paper 8 into selection
deselect
apply mask
merge group
resize 90

Dropshadow as you go 2,5,40,10,black

element 51 resize 50
element 63 resize 50, position at bottom of arch
element 66 resize 50, position below arch, erase parts that are showing outside the arch
element 56 resize 20, position below the grass a little. Butt up to the to the left edge of the arch
paste tube on top resize 40, position slightly to the right so you can see the 
castle a bit behind her head
element 70 resize 50, position at the bottom, go back and erase any of the dress 
that is showing under the grass
element 109 resize 22, position to the left
element 23 resize 22, position to the right

freehand selection tool, feather 13, draw a small selection along the bottom edge of the glass
bottle, hit delete twice, deselect.  
This softens the edge of the glass and makes it look like its "in" the grass

element 26 resize 22, position in between the glass bottle and the mushrooms
element 105 resize 50, position just above mask layer around the arch

Add any other elements you wish, rearrange your layers to suit

Add name, copyright and license information
delete white background
merge visible
crop and save as png

Sunday, 16 September 2018

Descent


This tutorial was written by Mizteeque on 16th September 2018, and assumes a working knowledge of psp
written using psp9 but other versions should work just as well
Any similarity to other works is unintentional and purely coincidental

~~~~~~~~~~~~~~~~~~~~~~~~~~~~~~~~~~~~~~~


Supplies needed:

Tube of choice - I am using the gorgeous artwork of Very Many 
which can be purchased from the store HERE
Scrapkit - Deliberate Descent from Chaos Priestess
My Mask 270 HERE
Font of choice

~~~~~~~~~~~~~~~~~~~~~~~~~~~~~~

A nice easy, copy and paste tutorial!!

Open blank canvas 700 x 700
floodfill white

c/p paper 06
apply mask 
merge group

c/p frame 01
rotate right 90
resize by 80

c/p cluster 01
position along left hand side of frame

c/p flower 01
resize 60
position bottom left corner of frame

c/p chalice
resize 60
position in front of rose

c/p flower 05
resize 60
position top left corner of frame
drag under the cluster

c/p padlock
resize 70
position top right corner of frame
drag to top of layer palette
you may wish to erase a small portion of the
ribbon so it doesnt go right across your tube

c/p tube just below frame
resize to fit
erase any that is showing outside the frame

d/s all elements 2,5,50,8,black

add your name, copyright and license information
delete white background
merge visible

crop and save as png

Thursday, 19 July 2018

Black Wolf

This tutorial was written by Mizteeque on 19th July 2018 and assumes a working knowledge of psp
Written using psp9 but other versions should work just as well
Any similarity to other works is unintentional and purely coincidental

~~~~~~~~~~~~~~~~~~~~~~~~~~~~~~~~~~~~~~~~

supplies needed:

tube of choice - I am using the beautiful artwork of VeryMany
which can be purchased from the store HERE
scrapkit - A kiss for luck from Pink Paradox Productions
Mask HERE - just right click and save
font of choice

~~~~~~~~~~~~~~~~~~~~~~~~~~~~~~~~~~


open blank canvas 700 x 700
floodfill white

c/p paper 22
resize 80
apply mask
merge group
resize 90

element 95
resize 40
position to the right so the handle is lined up with edge of mask

element 59, resize 40
position in front of pump so the spout is directly 
over the hole in the watering can

element 163, resize 40
position in front of watering can
dupliate, mirror
drag watering can to top of layer palette
freehand selection tool, feather 13
draw a ragged selection along the bottom of the can
hit delete a couple of times, to make it look like the
can is standing in the grass
deselect

element 162, resize 60
position at bottom of tag
drag below the pump layer

element 159, resize 30
position in front of pump

element 152, resize 30
position to the left

element 125, resize 40
drag down layer palette so its under the pump layer
position to the left behind the mushroom

element 3
resize 15
position to your liking
duplicate and position somewhere else on your tag

d/s all elements
2,5,50,9,black

c/p your tube
resize as necessary
position to your liking

add name, copyright and license information
delete white background layer
merge visible
save as png


Monday, 16 July 2018

Champagne Secret


This tutorial was written by Mizteeque on 16th July 2018 and assumes a working knowledge of psp
Written using psp9 but other versions should work just as well
Any similarity to other works is unintentional and purely coincidental

~~~~~~~~~~~~~~~~~~~~~~~~~~~~~~~~~~~~~~~~

Supplies needed:

Tube of choice - I am using the beautiful artwork of Very Many
which you can purchase from the store HERE
Template 843 from Millies PSP Madness
Scrapkit - Champagne Secrets by Pink Paradox Productions
Font of choice

Filters - Eye Candy 5 Impact
Muras Meister Copies

~~~~~~~~~~~~~~~~~~~~~~~~~~~~~~~~~~~~~~~~~

Open template
shift D to duplicate, close original

delete credits layer

layer 10, select all, float, defloat
c/p paper 6
resize 60
invert selection 
delete
invert selection
new raster layer

effects, eye candy 5 impact - glass with the following settings


deselect
merge glass layer with paper layer
delete raster 10

repeat for layers 1 & 2 using paper 41

repeat for layer 3 using paper 17

repeat for layer 4 using paper 11

layer 5, select all, float, defloat
c/p paper 1
invert selection
delete
deselect
delete layer 5

c/p frame 5
resize 55

merge layers 6,7,8,9 together
select all, float, defloat
c/p paper 40
invert selection 
delete
keep selected
c/p paper 15
delete
invert selection
contract by 3
delete
expand by 3
c/p tube
position in one of the cirlces
invert, delete
paste tube again
position in the next circle
delete
repeat for the last 2 circles
deselect

if you need to, erase any parts of 
the tubes that overlap in the other circles
merge all 4 tube layers together
change blend mode to luminance legacy
move down one layer so they are under the gold circles
but on top of the black circles

delete original layer

hide the top 3 layers

c/p element 114
resize 15
Muras Meister, copies, with following settings


c/p element 123
resize 15
repeat copies
rotate, right 13
d/s both flower layers
2,5,40,9,black

c/p tube
resize as necessary
bring to top of layer palette
erase any that is hanging over the bottom of the tag
d/s

I used the following elements for my tag
most on top of the tube layer and arranged to my 
liking at the bottom of the tag

el 140 
el 136 
el 133 
el 126 
el 116 
el 118 
el 131 
el 155 
el 21 
el 22 
el 28 
el 34 
el 45 

dont forget to dropshadow as you go

when you are happy with the placement of all your
elements, merge visible

add your name, copyright and license information
merge visible
save as png