Showing posts with label Arthur Crowe. Show all posts

Friday, 4 October 2019

Faith Hope Courage


This tutorial was written by Mizteeque on 4th October 2019, and assumes a working knowledge of psp.
Any similarity to other works is unintentional and purely coincidental.

Supplies needed
Tube of choice - I am using a gorgeous tube from Arthur Crowe
you can purchase similar from his store HERE

This is very much a "make it your own" tut
you will need a scrapkit of your choice, one that contains
several different flowers, in any color
and a round mask and font of your choice.


open blank canvas 700 x 700
floodfill white

c/p  paper of choice
apply your mask
merge group

c/p several different flowers and resize to fit
duplicate, flip, mirror and position around the edge of the mask circle
to your liking, add some other elements of choice
colorize if necessary
dropshadow all your elements

c/p your tube
resize to fit
position in the middle of your tag 
make sure the bottom of your tube in beneath the flowers
at the bottom of the tag
dropshadow

c/p wordart (from bottom of this post)
position across the bottom of your tag

add some sparkles

add your name, copyright and license information
delete white background
merge visible
crop and save as png

click on the 'very faint' image above to open full size  
and save to your computer

Sunday, 29 September 2019

BCA


Supplies needed:

Tube of choice - I am using the beautiful artwork of Arthur Crowe
which can be purchased from the store HERE
My supplies HERE
Font of choice


Open supplies
shift & D to duplicate the template
close original

layer 2, select all, float, defloat, 
c/p paste paper 1, resize 70, invert, delete
deselect
delete original layer 2

layer 4, repeat same as layer 2 but with paper 2

layer 6, select all, float, defloat, 
new raster layer, floodfill with pink/white gradient
linear, angle 49, repeats 2
keep selected
copy and paste large tube as new layer, 
invert selection, delete
deselect
change blend mode to luminance legacy
duplicate
adjust blur - gaussian blur 9
change blend mode to screen
lower opacity on both tube layers to around 50

copy and paste smaller tube as new layer
mirror, position to your liking

c/p the roses, position along the bottom of the large oval
erase any of the tube sticking out from the bottom of the roses

c/p clouds, position across the flowers

on BCA layer, select all, float, defloat
new raster layer
floodfill with pink
new raster layer
effects - eye candy 5 impact - glass 
with the following settings

expand selection by 2
back on the BCA layer, floodfill white
deselect

copy and paste sparks, move down a little

Add your dropshadows
Add your name, copyright and license information
delete white background layer
merge visible
crop and save as png

Saturday, 21 April 2018

Rock Chick

This tutorial was written by Mizteeque on 21st April 2018 and assumes a working knowledge of psp
Written using psp9 but other versions should work just as well
Any similarity to other works is unintentional and purely coincidental

Supplies needed:

Tube of choice - I am using the awesome artwork of  Arthur Crowe
You can purchase this tube from the store HERE
Scrapkit - Bad Girl Glamour by Pink Paradox Productions
My mask Miz_mask 247
Font of choice
Wordart (save from bottom of post)

~~~~~~~~~~~~~~~~~~~~~~~~~~~~~~~~~~~
Dont forget to dropshadow as you go along
I use 2,5,50,13, black


Open blank canvas 700 x 700
floodfill white

c/p paper 39
apply Miz_mask 247
merge group
dupliate, mirror and flip
move down a little
merge masks together

frame 3, resize 40

frame 12, resize 40
adjust, colorize, hue 25, sat 112

element 193, resize 40, mirror, move to top of tag

element 143, resize 40
drag below frames, erase any that is showing outside of the frame
change blend mode to luminance legacy

element 111, resize 40, bring to top
move it down to the bottom of the tag, 
carefully erase the top right end of the keyboard
so it looks like it is disappearing behind the frames

element 64, resize 20, mirror and flip, position so it mostly covers the 
other end of the keyboard

element 60, resize 20, rotate right 90, position behind money

element 17, resize 25, position bottom right

element 39, resize 30, position behind the briefcase to the right a little

element 43, resize 20, position in front of case and bottle

element 53, resize 20, rotate right 32, position bottom middle

element 199, resize 30, rotate right 32, drag down layer palette to just above mask layer
position at bottom of mask

make notes layer active, c/p tube, resize to fit

c/p wordart, resize 50, adjust, sharpness, sharpen more, position at bottom of tag
I added a black gradient glow to mine

add your name, copyright & license information
delete white background layer
merge visible
crop and save as png


(click to open and save to your computer)


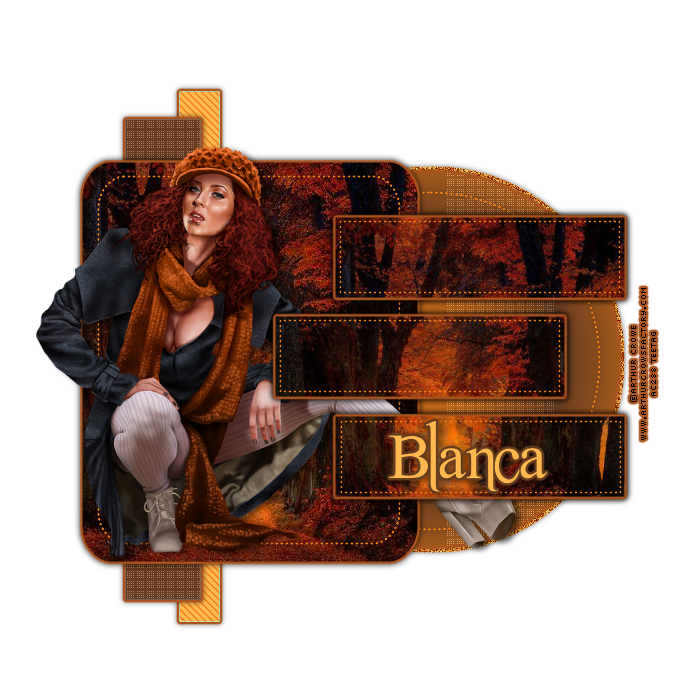
Saturday, 21 October 2017

Autumn Decor


This tutorial was written by Mizteeque on 21st September 2017 and assumes a working knowledge of psp
Written using psp9 but other versions should work just as well
Any similarity to other works is unintentional and purely coincidental
~~~~~~~~~~~~~~~~~~~~~~~~~~~~~~~~~~~~~~~~


Supplies needed:

Tube of choice - I am using the artwork of Arthur Crowe
which you can purchase from his store HERE
My Template 103 HERE
An autumn image - A nice selection HERE

Filters - Penta.com
Eye Candy 4000

~~~~~~~~~~~~~~~~~~~~~~~~~~~~~~~~~~~~~~~~~~~

Open template
shift & D to duplicate
close original

delete credits

Layer 1
select all, float, defloat
new raster layer
floodfill with gradient using 2 colors
from your image
sunburst, repeats 2
deselect

selection tool - custom selection
left 440
top 67
right 550
bottom 630

effects - penta.com - dot & cross
default settings
deselect

Layer 2
select all, float, defloat
new raster layer
floodfill with light color from your gradient
deselect
effects - penta.com - jeans
amount 5, width 7
delete original layer

Layer 3
select all, float, defloat
new raster layer
floodfill with dark color from your gradient
deselect
effects - penta.com - dot & cross
default settings
delete original layer

layer 4
select all, float, defloat
copy and paste your image as new layer
reposition to your liking but still within the selection
invert
delete
deselet
delete original layer

Layer 5
select all, float, defloat
paste your image again
resize 60 reposition so still inside the selection
invert
delete
deselect
delete original layer

add a gradient glow to each layer 
worked on so far, using a color that
matches your tag

On the circle layer, after adding the gradient glow
select all, float, defloat
expand by 4
new raster layer
floodfill with light color
add noise, 100, random & monochrome checked
deselect
Layers, arrange, move down

On each dots layer
select all, float, defloat
new raster layer
floodfill with a color to match your tag
deselect
delete each original dot layer

dropshadow each layer
0,0,50,8, black

Copy and paste tube as new layer
resize to fit nicely inside the large 
image rectangle

Add name, copyright & license information
delete white background layer
merge visible
save as png


Some more examples made by the wonderful members of Taggers Inn


Monday, 12 June 2017

Pirate Ahoy!


Supplies needed:

Tube of choice - I am using the beautiful artwork of Arthur Crowe
You can purchase this from his store HERE
Scrapkit - Surf n Turf from Horseplays Pasture
My mask 167 HERE
Font of choice

~~~~~~~~~~~~~~~~~~~~~~~~~~~~~~~~~~~~~~~~
This tutorial was written by Mizteeque on 1st June 2017  and assumes a working knowledge of psp
Written using psp9 but other versions should work just as well
Any similarity to other works is unintentional and purely coincidental
~~~~~~~~~~~~~~~~~~~~~~~~~~~~~~~~~~~~~~~~


open blank canvas 700 x 700
floodfill white

copy and paste paper 6
apply mask
merge group
duplicate, image, mirror

copy and paste element 51

arrange the mask layers so one is moved
up a little and one is moved down a little

copy and paste element 69
resize 60, rotate right 23
drag below element 51, position so
large palm is showing to the left of the rings
erase any parts of the palm showing inside the rings

c/p element 56
resize by 40
position to the right of bottom ring
duplicate, image, mirror

c/p element 73
resize by 40
drag to top of layer palette
position bottom left of bottom ring

c/p element 48
resize by 30
position bottom right of bottom ring

c/p element 17
resize by 20
position on top of sand spilling from bucket

c/p element 18
resize by 40
position behind shell
duplicate, mirror
drag down behind bucket

c/p close up tube as new layer
ensure it is just below the rings layer
duplicate twice
position so a different part of each tube
is showing inside the rings
and erase any parts showing outside the rings
merge the 3 tube layers together
change blend mode to luminance

paste regular sized tube at top of layer palette
resize to fit nicely 
position to the right of the rings slightly

dropshadow tube and all elements 2,5,50,8,black

Add your name, license and copyright information
delete white background layer
merge visible 
crop and save as png

Sunday, 1 January 2017

Vintage Beauty


Supplies needed:

Tube of choice I am using the awesome artwork of Arthur Crowe
which can be purchased from his store HERE
FTU scrapkit Vintage from Dreamland Designs
Eye candy 5 Impact

~~~~~~~~~~~~~~~~~~~~~~~~~~~~~~~

This tutorial was written by Mizteeque on 22nd December 2016 and assumes a working knowledge of psp
Written using psp9 but other versions should work just as well
Any similarity to other works is unintentional and purely coincidental

~~~~~~~~~~~~~~~~~~~~~~~~~~~~~~~


Open blank canvas 700 x 700
floodfill white

copy and paste paper 20 as new layer

preset shapes tool - rectangle, line width 12
foreground colour dark brown, background colour null
draw out a rectangle in the middle of your canvas
convert to raster

Eye candy 5 Impact - Chrome
reflection map - Abstract - Penny
leave all other settings at default

magic wand, click inside your rectangle
expand selection by 3
invert selection
on paper layer, click delete
deselect

copy and paste lantern as new layer
resize by 50
position top right corner of frame

copy and paste dress form as new layer
resize by 15
position bottom left corner of frame

copy and paste flower as new layer
resize by 50
rotate right 90
position bottom left, erase the stem

copy and paste flowers 2 as new layer
resize by 15
image, flip
drag below the dress form

copy and paste flowers as new layer
resize by 35
rotate right 90
position bottom left, between the dress form
and the flower

copy and paste chicken wire as new layer
drag down under the paper so a little is 
showing outside the edge of the paper
duplicate, image, mirror
duplicate, rotate right 90, position so it can
be seen beneath the flowers
duplicate, image, mirror & flip

make frame layer active
magic wand, click inside the frame
expand by 3
make paper layer active
copy and paste tube as new layer
invert selection
hit delete
deselect

Change blend mode on tube to luminance legacy
duplicate
adjust, blur, gaussian blur 7
change blend mode to screen
reduce opacity to around 75

dropshadow all layers except, paper and blurred tube
2,5,50,8,black

add name, copyright and license information
delete white background
merge visible
save as png

Monday, 8 February 2016

Be Mine - forum set


Supplies needed:


Tube of choice, I am using the beautiful artwork of Arthur Crowe
you can purchase his tubes from his store HERE
A tube with several sizes is preferable 
Fonts of choice - I used Century Gothic and Inspiration

~~~~~~~~~~~~~~~~~~~~~~~~~~~~~~~~~~~~~~~~~

This tutorial was written by Mizteeque on 21st January 2016
Written using psp9 but other versions should work just as well
Any similarity to other works is unintentional and purely coincidental

~~~~~~~~~~~~~~~~~~~~~~~~~~~~~~~~~~~~~~~~~


Open blank canvas 700 x 250
floodfill with gradient made from two colours from your tube
linear, angle 0, repeats 0

c/p small tube
 move to right slightly, so its just off center
duplicate, image, mirror

c/p medium tube
move to far right
duplicate,
image, mirror

merge all tubes together
change blend mode to lumincance
duplicate
adjust blur, gaussian blur 8
change blend mode to screen
merge visible

new raster layer
floodfill white
layers, arrange, send to bottom

lower opacity of merged layer to between 60 - 65
Effects, Texure effects, blinds
width 3, opacity 30, color white, horizontal checked

c/p close up tube 
resize if necessary, but ensure it is still larger than other tubes
d/s 2,5,50,8,black
merge visible

preset shape tool
heart
line width 1
foreground color light one from your tube
draw out a tiny heart
convert to raster
copy
paste as new selection next to the first heart
repeat paste 3 more times so you have a line of 5 hearts
position bottom left corner of tag
duplicate, image, mirror
merge down
d/s 2,2,50,3,black

using century gothic font, size 16
background color the same as your hearts
type out "BE MINE"
convert to raster
duplicate
position above hearts
merge visible

new raster layer
floodfill with gradient you used at the start, but change the
angle to 45, repeats to 5
select all, contract by 3
hit delete on your keyboard

add name, license and copyright information
merge all
save as jpg

To make matching Avatar

custom selection tool
top & left 0, right & bottom 200
selections, edit selection
move red square to a point on your tag that you like
edit selection
copy

paste as new image
add same border as we did for the banner
add name, license & copyright info
merge all 
save as jpg

Wednesday, 27 January 2016

Brush Strokes


Supplies needed:

Tube of choice - preferably one that has multiple sized layers
I Love Arthur Crowe tubes for this reason
You can purchase them from his store HERE
Font of choice
Filter - Brush Strokes which you can download HERE

~~~~~~~~~~~~~~~~~~~~~~~~~~~~~~~~~~~~~~~~~~~~~~~~~

This tutorial was written by Mizteeque on 27th January 2016
written in psp9 but any version should work
any resemblance to other works is entirely coincidental


Note: c/p = copy and paste as new layer
d/s = dropshadow 


Open blank canvas 700 x 250
floodfill with gradient made from two colours from your tube
sunburst, repeats & angle 0

c/p close up tube
position to your liking in middle of tag
change blend mode to Luminance
duplicate
On bottom tube layer
effects, brush strokes, crosshatch
stroke length 13
sharpness 6
strength 1


On duplicate tube layer, change blend mode to screen
lower opacity on both tube layers to around 50

c/p medium tube
position to far left

c/p small tube
position to far right

d/s medium and small tubes
2,5,50,8,black

preset shapes tool, rectangle
gradient, linear, angle 45, repeats 2
draw out a slim rectangle right across your tube
from left to right and towards the bottom of the tag
(but not right at the bottom, leave a gap)
convert to raster
duplicate
hide first rectangle

on duplicate, select all, float, defloat
contract by 7, hit delete on your keyboard
deselect

c/p small tube again 3 or 4 times
position across your tag
merge the tube layers together
on duplicate rectangle
select all, float, defloat, invert
now hit delete on your keyboard on each of the tube layers
apply the brush strokes, crosshatch filter
same settings as before
change blend mode to luminance legacy
unhide first rectangle
change blend mode to whatever looks good on your tag
I used multiply in my first example and duplicated the rectangle to make it slightly darker

new raster layer
floodfill with single color from your tube
select all, contract by 3
hit delete
deselect

Add name, copyright and license information
merge all flatten
save as jpg

To make matching Avatar

Selection tool, custom selection
top & left 0
right 150
bottom 200
edit selection
position the red box on your tag where you like it
edit selection
copy

paste as new image
add the single colour border like we did for the banner
add name, copyright, license info
merge all flatten
save a jpg

Here is another example


Saturday, 16 January 2016

Happy New Year -2016


Supplies needed:

Tube of choice.  I am using the beautiful artwork of Arthur Crowe
which you can find HERE
My Supplies HERE
My mask 083 HERE
Font of choice

~~~~~~~~~~~~~~~~~~~~~~~~~~~~~~~~

This tutorial was written by Mizteeque on 1st January 2016
written in psp9 but any version should work
any resemblance to other works is entirely coincidental

~~~~~~~~~~~~~~~~~~~~~~~~~~~~~~~~~~~~~~~


Open blank canvas 800 x 800
floodfill white


copy and paste cluster as new layer
(I have included two in the supplies, use whichever you prefer)


copy and paste frame as new layer
drag below cluster
rotate left 11


copy and paste tube as new layer
resize as necessary
position to your liking
erase any parts that are showing outside of 
frame on the left


your tube should now look like its coming out from
between the frame and the cluster


dropshadow frame and tube 4,6,44,8,black


copy and paste wordart as new layer
resize and position to your liking
dropshadow


make background layer active
copy and paste paper as new layer
apply mask
merge group
duplicate and merge down


add your name, copyright and license information
delete white background layer
crop and save as png


Thursday, 17 December 2015

Thanksgiving


Supplies needed: 


Tube of choice, I am using several tubes from Arthur Crowe
which can be purchased from his store HERE
My template 66 HERE
Font of choice

~~~~~~~~~~~~~~~~~~~~~~~~~~~~~~
This tutorial was written by Mizteeque on November 20th 2015
written in psp9 but any version should work
any resemblance to other works is entirely coincidental
~~~~~~~~~~~~~~~~~~~~~~~~~~~~~~

Open template, duplicate and close original
delete credits layer


Make lge Oval active
Select all, float, defloat,
copy and paste paper 14 as new layer
resize by 22
selections invert
hit delete on your keyboard
deselect


repeat the above instructions for the following layers


layer 1 - paper 2
layer 2 - paper 2
layer 3 - paper 5


Make layer 5 active, select all, float, defloat
new raster layer
floodfill with an orange/purple gradient 
linear, angle 45, repeats 4
deselect
delete original layer 5


Repeat for layer 6 but do not deselect


Now copy and paste your tubes(s)
resize and position inside the selection to your liking
selections invert
hit delete on your keyboard on each tube layer
deselect
Merge the tube layers together
change blend mode to Luminance(l)


make purple oval active
copy and paste flower 3 as new layer
resize by 8
position top center (so its poking out from behind the other rectangles)


copy and paste flower 4 as new layer
resize by 8
position so its overlapping the first flower


copy and paste leaf 2
resize by 15
position behind flowers, rotate slightly to the left


copy and paste leafy branch 
resize by 15
rotate slightly to the left, position next to the first leaf


duplicate both flowers and both leaves
and flip and mirror them both


make top right rectangle active
copy and paste bunting as new layer
resize by 8
position on top of rectangle


copy and paste flair 6 as new layer
resize by 8
position on left hand end of bunting


make background active
copy and paste scatter as new layer
resize by 20
position top left (so its showing from behind the purple oval)
duplicate 3 times and flip, mirror, rotate to your liking.


dropshadow all layers 2,5,50,8,black, except Luminance tubes


copy and paste main tube as new layer
resize to fit
position bottom left, so its sitting nicely between the two left hand circles
but make sure it is under your wordart layers
dropshadow as before


make wordart active
select all, float, defloat,
new raster layer
floodfill with same gradient we used earlier
deselect
delete original wordart layer


add name and copyright information
delete white background layer
merge visible
save as png


Sunday, 11 October 2015

Autumn Witch


Supplies needed:


Tube of choice - I am using the gorgeous artwork of Arthur Crowe
you can purchase his work HERE
Scrapkit Golden Days of Autumn by Golddust
Mask 093 from my blog HERE
Font of choice

~~~~~~~~~~~~~~~~~~~~~~~~~~~~~


This tutorial was written by Mizteeque on September 19th 2015
written in psp9 but any version should work
any resemblance to other works in entirely coincidental


OK Lets begin!!


Open blank canvas 800 x 800
flood fill white

copy and paste paper 8 as new layer
apply mask 93 
merge group

copy and paste window as new layer
resize by 60

copy and paste tree 1 as new layer
resize by 60

position behind window to the right
erase any parts showing on the inside of the window
and the trunk from  under the window

make window layer active

copy and paste gold leaf scatter 5 as new layer
position along the bottom of the window

copy and paste dry flowers as new layer
position along bottom of window

copy and paste acorns 2 as new layer
position top left of window

copy and paste lamp as new layer
position to the left so its just overhanging the left window

copy and paste pumpkin 2 & 3 as new layers
resize by 40
position bottom left of lamp

copy and paste bird as new layer
resize by 60

postion to the right so its sitting on the dry flowers

dropshadow all elements
2,5,50,8, black

copy and paste tube as new layer
resize as necessary
position above window frame but below all other elements
and in front of the right window
dropshadow


add name, copyright & license information
delete white background
merge visible
crop and save as png.

Sunday, 12 July 2015

Curious Sparkle


Supplies needed:


Tube of choice, I am using the beautiful artwork of Arthur Crowe
You can purchase his tubes from his store HERE
Scrapkit - Curious from Scrappy bit of Fun
Sparkly Animation 514 from Scrappy bit of Fun
Font of choice - I used New Romantics

~~~~~~~~~~~~~~~~~~~~~~~~~~~~~~~~
This tutorial was written by Mizteeque on June 12th 2015
written in psp9 but any version should work
any resemblance to other works in entirely coincidental


Open blank canvas 800 x 800
floodfill white

c/p background 002

c/p flower 011
effects, muras meister, copies, encircle, change the number to 6

c/p flower 009
resize by 60
effects, muras meister, copies, encircle, change the number to 11

selection tool, circle, feather 0
draw out a circle from the centre of your canvas to halfway
across the pink flower cirlcle.  Make the blue flowers layer active
hit delete, so none of the blue flowers are showing in the center
of the pink flowers
deselect.

Make pink flowers layer active

c/p flower 001b
position to bottom left of tag

c/p frame 004
image, mirror, resize by 60
position bottom right of tag

c/p flower 014
position bottom middle of tag

c/p tube
resize if necessary
drag down 3 layers so its below the elements, but above the flower frames
erase any of the tube that is showing below the elements

dropshadow all layers
2,5,50,11, black

resize by 70, all layers checked
add name - Font New Romantics, size 48, color blue from your tag
I added some noise and a white gradient glow to mine then a dropshadow
add copyright information
merge all flatten

copy

Open Animation Shop

paste as new animation
click duplicate button until you reach 17 frames
then click the paste after current frame button once for a total of 18 frames

open SimoneAni514-MNG

Select all (ctrl & A)
copy

click on tag
Select all (ctrl & A)

paste into selected frames
click on your tag to add the animation

save as gif