Saturday, 21 October 2017

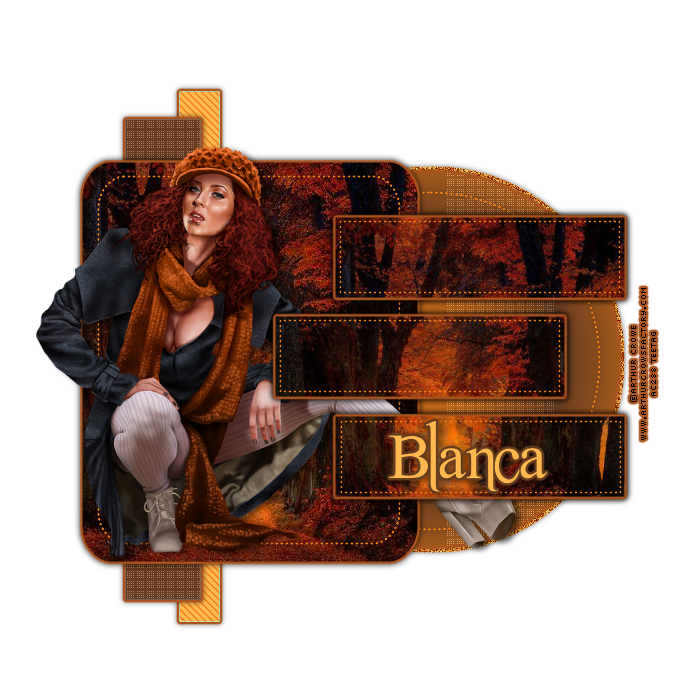
Autumn Decor


This tutorial was written by Mizteeque on 21st September 2017 and assumes a working knowledge of psp
Written using psp9 but other versions should work just as well
Any similarity to other works is unintentional and purely coincidental
~~~~~~~~~~~~~~~~~~~~~~~~~~~~~~~~~~~~~~~~


Supplies needed:

Tube of choice - I am using the artwork of Arthur Crowe
which you can purchase from his store HERE
My Template 103 HERE
An autumn image - A nice selection HERE

Filters - Penta.com
Eye Candy 4000

~~~~~~~~~~~~~~~~~~~~~~~~~~~~~~~~~~~~~~~~~~~

Open template
shift & D to duplicate
close original

delete credits

Layer 1
select all, float, defloat
new raster layer
floodfill with gradient using 2 colors
from your image
sunburst, repeats 2
deselect

selection tool - custom selection
left 440
top 67
right 550
bottom 630

effects - penta.com - dot & cross
default settings
deselect

Layer 2
select all, float, defloat
new raster layer
floodfill with light color from your gradient
deselect
effects - penta.com - jeans
amount 5, width 7
delete original layer

Layer 3
select all, float, defloat
new raster layer
floodfill with dark color from your gradient
deselect
effects - penta.com - dot & cross
default settings
delete original layer

layer 4
select all, float, defloat
copy and paste your image as new layer
reposition to your liking but still within the selection
invert
delete
deselet
delete original layer

Layer 5
select all, float, defloat
paste your image again
resize 60 reposition so still inside the selection
invert
delete
deselect
delete original layer

add a gradient glow to each layer 
worked on so far, using a color that
matches your tag

On the circle layer, after adding the gradient glow
select all, float, defloat
expand by 4
new raster layer
floodfill with light color
add noise, 100, random & monochrome checked
deselect
Layers, arrange, move down

On each dots layer
select all, float, defloat
new raster layer
floodfill with a color to match your tag
deselect
delete each original dot layer

dropshadow each layer
0,0,50,8, black

Copy and paste tube as new layer
resize to fit nicely inside the large 
image rectangle

Add name, copyright & license information
delete white background layer
merge visible
save as png


Some more examples made by the wonderful members of Taggers Inn


Monday, 16 October 2017

Moment


This tutorial was written by Mizteeque on 16th October  2017 and assumes a working knowledge of psp
Written using psp9 but other versions should work just as well
Any similarity to other works is unintentional and purely coincidental
~~~~~~~~~~~~~~~~~~~~~~~~~~~~~~~~~~~~~~~~


Supplies needed:


Tube of choice - I am using the beautiful artwork of Enys Geurrero
which can be purchased from CDO
Scrapkit A Moment in Time from Pink Paradox Productions
Timeline mask 22 from Moonbeams and Spiderwebs
Font of choice - I used Inspiration

~~~~~~~~~~~~~~~~~~~~~~~~~~~~~~~~~~~~~~~~

open blank canvas 700 x 259
floodfill white

copy and paste AMIT_papers
apply mask
merge group

copy and paste frame 5
resize 31
Image effects, offset
horizontal 120, vertical -67, transparent 

copy and paste element 92
resize 31
position on top of frame so it
follows the curve
(yes it will disappear off the bottom of the canvas)

copy and paste element 61
resize 20
Offset, H 195, V 17
drag below the frame
erase any that is showing inside the frame

copy and paste element 50
resize 20
Offset, H -10, V -75
drag to top of layer palette

copy and paste element 31
resize 20
Offset, same as last time
drag below the frame
erase any that is showing inside the frame

copy and paste element 104
resize 70
rotate left 90
drag to top of layer palette

copy and paste element 100
resize 60
rotate left 90
Offset, H & V -102
drag below frame
erase any showing inside frame

copy and paste element 101
resize 25
rotate right 90
Offset, same as last time

copy and paste element 80
resize 25
rotate left 71
Offset, H -102, V -68
layers, arrange layers, move down

copy and paste element 84
resize 25
Offset, H-78, V-68

Make the blue flowers on top of frame active
duplicate, image, mirror

make frame layer active
copy and paste tube 
drag below frame
resize as necessary to fit inside frame
erase any that is showing outside of the frame
change blend mode to luminance legacy

dropshadow all layers except the sparkles and mask

delete white background layer
merge visible
duplicate
Image, flip

Image, canvas size 800 x 800

On original merged layer
Offset, H 0, V 88
On duplicated layer
Offset, H 0, V -170
reduce opacity to 54

using your deform tool
drag the bottom middle node up to at
least half its original size
then holding down the CTRL key
drag the bottom left node out to the edge of your canvas

add name, copyright and license information
Merge visible
crop and save as png


Cute Halloween


This tutorial was written by Mizteeque on 18th September 2017 and assumes a working knowledge of psp
Written using psp9 but other versions should work just as well
Any similarity to other works is unintentional and purely coincidental
~~~~~~~~~~~~~~~~~~~~~~~~~~~~~~~~~~~~~~~~


Supplies needed:

Tube of choice, I am using a FTU tube from No Flutter
Scrapkit - Cute Halloween by Jojo HERE
Mask of choice - I used mask 84 from Wee Scots Lass
Font of choice - I used Creepy Girl
Muras Meister - copies

~~~~~~~~~~~~~~~~~~~~~~~~~~~~~~

Lets make a frame first!

Open paper 8
selection tool, circle, feather 0
draw out a large circle in the middle of the paper
copy
close paper without saving

open blank canvas 700 x 700
paste as new layer
select all, float, defloat,
contract by 25
delete
deselect
add your favourite inner bevel

magic wand, feather 0
click inside the circle
expand by 3
c/p paper 1
invert selection
delete
invert again
contract by 20
delete
deslect
inner bevel as before

open paper 3
selection tool, circle 
draw out a tiny circle in the middle
copy
close without saving
paste as new layer on your canvas
inner bevel as before
effects - muras meister, copies - encircle
you will need to play with the top 3 settings 
until you have a circle of joined green dots that show
just outside your orange circle - the aim is to make
a scalloped border
My settings were 49, 87, 87

Merge visible
thats your frame made

open blank canvas 700 x 700 
floodfill white

c/p paper 3
apply mask
merge group

c/p frame we just made
resize if necessary
You can save frame for other projects or close it now!

c/p element 50
drag below frame
erase any that is showing from behind the frame
add noise, 100, random, monochrome checked

c/p element 7
resize 60
position bottom left

c/p element 44
resize 30
position just to the right of the bag

c/p element 10
resize 60
position to the right of the spell book

c/p element 8
resize 60
position at the bottom in the middle

c/p element 3
place on pumpkin bucket

c/p element 45
position top left

Make frame layer active
c/p tube 
resize as necessary
erase any that is showing under the elements

d/s all elements, tube and frame

Add name, copyright and license information
delete white background
merge visible
save as png

Tuesday, 26 September 2017

Kaleidoscope


This tutorial was written by Mizteeque on 10th September 2017 and assumes a working knowledge of psp
Written using psp9 but other versions should work just as well
Any similarity to other works is unintentional and purely coincidental
~~~~~~~~~~~~~~~~~~~~~~~~~~~~~~~~~~~~~~~~


Supplies needed

Tube of choice - I am using a FTU tube from Cris Ortega
Cluster frame by Sweet Temptations
Filter Factory A
Eye Candy 4000
Muras Meister Copies

~~~~~~~~~~~~~~~~~~~~~~~~~~~~~~~~~~

open blank canvas 700 x 700
floodfill white

copy and paste cluster
muras meister, copies
wallpaper rotate - default settings

Filter Factory A - Kaleidoscope II
divisions 184, rotations 16
You should end up with an 8 pointed
star shape in the middle of canvas

selection tool
point to point, feather 14
mode (add)
starting at the top of a point
select in a zig zag around the
points of the star shape

invert selection
hit delete on your keyboard 
a couple of times
deselect

Eye candy 4000 - corona
change the color to light green from
center of star
width 35, all other settings default

paste cluster again 
resize by 90

copy and paste tube as new layer
drag below cluster
erase any that is showing outside the cluster

dropshadow cluster

add name, copyright and license information
delete white background layer
merge visible
save as png


Here are some more examples made by members of my forum Taggers Inn


Autumns Delight


This tutorial was written by Mizteeque on 27th August 2017  and assumes a working knowledge of psp
Written using psp9 but other versions should work just as well
Any similarity to other works is unintentional and purely coincidental
~~~~~~~~~~~~~~~~~~~~~~~~~~~~~~~~~~~~~~~~


Supplies needed

Tube of choice - I am using the gorgeous artwork of Misticheskaya
which can be purchased from Pics for Design
My Scrapkit - Autumn Delight HERE
My mask 166 HERE
Font of choice

~~~~~~~~~~~~~~~~~~~~~~~~~~~~~~~~~~

open blank canvas 700 x 700
floodfill white

c/p paper 7
apply mask
merge group

c/p paper 1
apply mask again
merge group
image, flip & mirror
merge down

c/p element 40
resize by 70
rotate right 5

c/p element 14
resize by 50
erase the stem and move to the bottom
of the mask layer

c/p element 3
resize by 30
drag down below and to the right of the flower
duplicate, image, mirror

duplicate flower
resize by 50
mirror and position down and left a little
duplicate
image, mirror
drag below the first leaf layer
position so its just showing from behind the top of the leaf

c/p element 4
resize by 15
drag to top of layer palette
duplicate
resize by 80
position one in front of the other
next to small flower

dropshadow all elements
2,5,50,8, black

c/p tube 
resize to fit nicely
drag down layer palette so its just above the frame
erase any that is showing from behind the elements

add name, copyright and license information
delete white background layer
merge visible
save as png


Here are some more examples made by the members of my forum Taggers Inn


So Grave!


This tutorial was written by Mizteeque on 8th August 2017  and assumes a working knowledge of psp
Written using psp9 but other versions should work just as well
Any similarity to other works is unintentional and purely coincidental
~~~~~~~~~~~~~~~~~~~~~~~~~~~~~~~~~~~~~~~~


Supplies needed

Tube of choice - I am using the beautiful artwork of Kurama Phoenix
which can be purchased from CDO
Mask1 from set 90 by Rachel Designs
Supplies HERE
Font of choice
Eye candy 4000 - Corona


~~~~~~~~~~~~~~~~~~~~~~~~~~~~~~~~~~

Open blank canvas 700 x 700
floodfill white

copy and paste background image as new layer
apply mask 1
merge group
resize 90

copy and paste moon as new layer
adjust, brightness/contrast
brightness 95, contrast 20
image, flip
position over the moon in the mask

copy and paste flock as new layer
resize by 40
position so some birds are across the moon

copy and paste cloud 1,2 & 3 as new layers
position at the top of tag, so some cover the 
bottom of the moon.

copy and paste cobbles as new layer
position at bottom of tag

copy and paste tower as new layer
resize 24

copy and paste tree as new layer
reseize 35
position to the left of tower
duplicate
image, mirror
resize 70
drag below the tower and position to the right

copy and paste roses as new layer
resize 50
position just in front of tree

copy and paste tombstones as new layer
resize 50
position to the right of the tower

copy and paste tube as new layer
resize to fit

copy and paste skulls as new layer
resize 15
position bottom left

copy and paste skull as new layer
resize 25
position in front of other skulls

open birds and select around just one of them
copy and paste it as a new layer
eye candy 4000, corona
change color to a grey/blue color from the clouds
glow width 16, overall opacity 70, all other settings default

dropshadow all elements except clouds
2,5,50,8, black

add name, copyright and license information
delete white background layer
merge visible
save as png

Here are some more examples made by my members over at Taggers Inn


Squareish


This tutorial was written by Mizteeque on 9th August 2017  and assumes a working knowledge of psp
Written using psp9 but other versions should work just as well
Any similarity to other works is unintentional and purely coincidental
~~~~~~~~~~~~~~~~~~~~~~~~~~~~~~~~~~~~~~~~


Supplies needed

Tube of choice - I am using a FTU tube by Soa Lee
Square(ish) mask of choice
Filter Factory D - Vertigo
Font of choice

~~~~~~~~~~~~~~~~~~~~~~~~~~~~~~~~~~

open blank canvas 700 x 700

copy and paste tube as new layer
muras meister - copies
wallpaper rotate default settings

effects - filter factory d - vertigo
default settings

custom selection
left & top 0
right & bottom 200
selections, edit selection
move to an area you like
edit selection
copy
deselect
paste as new layer

Select all, float, defloat

copy and paste tube again
resize to fit nicely in the square
invert selection
delete
invert again, 
expand by 2
new raster layer
floodfill white
contract 2
delete
deselect

hide bottom layer
merge visible

unhide bottom layer
apply mask
merge group

make small square active
rotate right 35
move to top right corner or tag

duplicate
resize 70
move down a little so its overlapping the first one
duplicate
resize 70
move down so its overlapping the 2nd one.

copy and paste tube again
move to the left
dropshadow

Add name, copyright & license information
merge visible
save as png