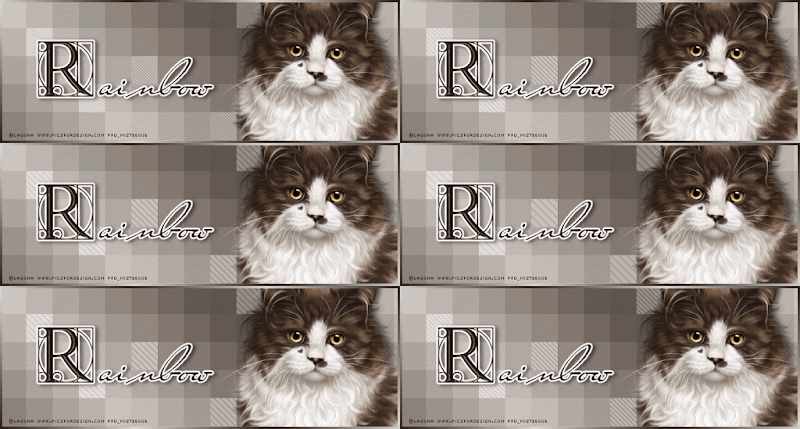
previews

Wednesday 27 January 2016

Brush Strokes


Supplies needed:

Tube of choice - preferably one that has multiple sized layers
I Love Arthur Crowe tubes for this reason
You can purchase them from his store HERE
Font of choice
Filter - Brush Strokes which you can download HERE

~~~~~~~~~~~~~~~~~~~~~~~~~~~~~~~~~~~~~~~~~~~~~~~~~

This tutorial was written by Mizteeque on 27th January 2016
written in psp9 but any version should work
any resemblance to other works is entirely coincidental


Note: c/p = copy and paste as new layer
d/s = dropshadow 


Open blank canvas 700 x 250
floodfill with gradient made from two colours from your tube
sunburst, repeats & angle 0

c/p close up tube
position to your liking in middle of tag
change blend mode to Luminance
duplicate
On bottom tube layer
effects, brush strokes, crosshatch
stroke length 13
sharpness 6
strength 1


On duplicate tube layer, change blend mode to screen
lower opacity on both tube layers to around 50

c/p medium tube
position to far left

c/p small tube
position to far right

d/s medium and small tubes
2,5,50,8,black

preset shapes tool, rectangle
gradient, linear, angle 45, repeats 2
draw out a slim rectangle right across your tube
from left to right and towards the bottom of the tag
(but not right at the bottom, leave a gap)
convert to raster
duplicate
hide first rectangle

on duplicate, select all, float, defloat
contract by 7, hit delete on your keyboard
deselect

c/p small tube again 3 or 4 times
position across your tag
merge the tube layers together
on duplicate rectangle
select all, float, defloat, invert
now hit delete on your keyboard on each of the tube layers
apply the brush strokes, crosshatch filter
same settings as before
change blend mode to luminance legacy
unhide first rectangle
change blend mode to whatever looks good on your tag
I used multiply in my first example and duplicated the rectangle to make it slightly darker

new raster layer
floodfill with single color from your tube
select all, contract by 3
hit delete
deselect

Add name, copyright and license information
merge all flatten
save as jpg

To make matching Avatar

Selection tool, custom selection
top & left 0
right 150
bottom 200
edit selection
position the red box on your tag where you like it
edit selection
copy

paste as new image
add the single colour border like we did for the banner
add name, copyright, license info
merge all flatten
save a jpg

Here is another example



Tuesday 19 January 2016

Diagonal Lines


Supplies needed

Tube of choice - I am using the very cute artwork of Laguna
which can be purchased from Pics For Design
Filters :
Muras Meister - copies
Carolaine & Sensibility
Eye Candy 4 - Gradient Glow
You can find all the filters HERE 


~~~~~~~~~~~~~~~~~~~~~~~~~~~~~~~~~~~~~~~~~~~
This tutorial was written by Mizteeque on 19th January 2016
written in psp9 but any version should work
any resemblance to other works is entirely coincidental
~~~~~~~~~~~~~~~~~~~~~~~~~~~~~~~~~~~~~~~~~~~


Open blank canvas 700 x 700
floodfill with gradient made from two colors from your tube
linear, angle 45, repeats 3

copy and paste tube as new layer
resize if necessary
apply muras meister copies, wallpaper rotate, default settings

Apply Carolaine & Sensibility filter 
CS-BRectangles
control 0 - 17
control 1 - 18
control 2 - 164
control 3 - 128


Selction tool, custom selection
top 0, left 0, right 700, bottom 250
Image, crop to selection

duplicate the C&S layer 3 times for a total of 4 
rename them from bottom to top 1,2,3,4
hide  2,3 & 4, 
working on the layer 1

selection tool, rectangle, feather 0, mode Add
select around several of the squares randomly
across the tag

apply C&S CS-DLines
control 0 - 40
control 1 - 5
change blend mode to Lumincance Legacy


unhide layer 2
repeat CS-DLines but change control 1 to 8
change blend mode to Lumincance Legacy

unhide layer 3
repeat CS-DLines but change control 1 to 11
change blend mode to Lumincance Legacy

unhide layer 4
repeat CS-DLines but change control 1 to 14
change blend mode to Lumincance Legacy

deselect

copy and paste tube as new layer
resize and position to your liking
dropshadow

duplicate bottom gradient layer
layers, arrange, bring to top
select all, contract by 4
hit delete on your keyboard

Add name
I used Typography Caps for the Initial and Close to you for the remainder of the name
I then applied a gradient glow and dropshadow
Add license & copyright information

hide layers 2,3 & 4 again

Copy merged
Open animation shop
paste as new animation 

back to psp
hide 1, unhide 2
copy merged

back to AS
paste after current frame

repeat for layers 3 & 4

make sure your arrow is selected in AS
hold down the shift key and click on frames 2 & 3
copy
now click on frame 4 
paste after current frame
click on Animation on the top toolbar and click on reverse frames

now when you play your animation the diagonal lines should look 
like they are going in and out

save as gif

Saturday 16 January 2016

Be Curious!


Supplies needed:

Tube of choice, I am using the artwork of Zlata M which 
you can purchase from Pics for Design
Scrapkit - Tainted Cupcake from K4 HERE
My wordart HERE *Warning* this wordart contains offensive language
Mask of choice
Font of choice
~~~~~~~~~~~~~~~~~~~~~~~~~~~~~~~~~~~~~~~~~

This tutorial was written by Mizteeque on 9th January 2016
Written using psp9 but other versions should work just as well
Any similarity to other works is unintentional and purely coincidental
~~~~~~~~~~~~~~~~~~~~~~~~~~~~~~~~~~~~~~~~~

Note: c/p = copy and paste as new layer
d/s = dropshadow


Open blank canvas 800 x 800
floodfill white

new raster layer
floodfill with gradient made from two colors from your tube or the kit 
linear, repeats 6, angle 45
apply mask
merge group

c/p frame 06 

c/p zippered heart 02
resize by 50
rotate right 11
position bottom right corner of the frame
duplicate 
resize by 50, image mirror
position just above first heart on the pink bit
Duplicate, image mirror
position bottom left of first heart
dropshadow all 3 hearts 2,5,50,8, black
merge hearts together

c/p lips 04
resize by 50
rotate left 11
position top right corner of frame
drag this layer below the hearts layer
d/s

c/p cupcake 03
resize by 30
position to the left of the hearts
d/s

make mask layer active

c/p tube as new layer
duplicte twice, hide these duplicates
position face inside middle frame

make frame layer active
magic wand, feather 0, select inside the middle frame
expand by 2
invert selection
hit delete on your tube layer
deselect

repeat for the two duplicated tube layers
but resize them by 70 
position one in the left frame and one in the right frame

Merge all 3 tube layers together
Change blend mode to Luminance (Legacy)
duplicate
adjust blur, gaussian blur, 10
change blend mode to Hard light (or whatever looks good on your tag)

Paste tube again, drag to the top of the layer palette

resize to fit 
position slightly to the left of center
d/s

c/p "Judgemental" wordart (the plain black one)
resize by 70
select all, float, defloat,
new raster layer
floodfill with gradient we used at the start
linear, angle 0, repeats 0

Add your favourite inner bevel or glass effect
deselect

Add fat white gradient glow
d/s
position to your liking

Add name, license and copyright information
delete white background layer
crop and save as png.

Happy New Year -2016


Supplies needed:

Tube of choice.  I am using the beautiful artwork of Arthur Crowe
which you can find HERE
My Supplies HERE
My mask 083 HERE
Font of choice

~~~~~~~~~~~~~~~~~~~~~~~~~~~~~~~~

This tutorial was written by Mizteeque on 1st January 2016
written in psp9 but any version should work
any resemblance to other works is entirely coincidental

~~~~~~~~~~~~~~~~~~~~~~~~~~~~~~~~~~~~~~~


Open blank canvas 800 x 800
floodfill white


copy and paste cluster as new layer
(I have included two in the supplies, use whichever you prefer)


copy and paste frame as new layer
drag below cluster
rotate left 11


copy and paste tube as new layer
resize as necessary
position to your liking
erase any parts that are showing outside of 
frame on the left


your tube should now look like its coming out from
between the frame and the cluster


dropshadow frame and tube 4,6,44,8,black


copy and paste wordart as new layer
resize and position to your liking
dropshadow


make background layer active
copy and paste paper as new layer
apply mask
merge group
duplicate and merge down


add your name, copyright and license information
delete white background layer
crop and save as png


Tina's Winter


Supplies needed:

Tube of choice - I am using the beautiful artowrk of Trinita
which you can purchase from Pics for Design
Scrapkit - Tina's Winter from Pink Paradox Productions
Mask HERE
Font of choice

~~~~~~~~~~~~~~~~~~~~~~~~~~~~~~~~~~~~~

This tutorial was written by Mizteeque on December 6th 2015
written in psp9 but any version should work
any resemblance to other works is entirely coincidental

~~~~~~~~~~~~~~~~~~~~~~~~~~~~~~~~~~~~~~

Open blank canvas 800 x 800 
floodfill white

Copy and paste paper 1 as new layer
apply mask
merge group

copy and paste paper 29 as new layer
apply mask
merge group
resize by 95
change blend mode to luminance

c/p element 87
rotate right 90

c/p element 82
resize by 40
position to the left

make top mask layer active
select all, float, defloat, 
selections invert
make trees layer active
hit delete on your keyboard
deselect

c/p tube as new layer
resize as necessary 
position to the right 

c/p elements of choice
resize to fit and place
to your liking

I used 10, 68, 69, & 77

dropshadow all elements and tube
2,5,50.8,black

c/p element 88
resize by 40
rotate right 90

Add  your name, license and copyright information
delete white background
merge visible
crop and save as png

Sunday 10 January 2016

Christmas Ribbon


Supplies Needed:

Tube of choice - I am using the beautiful artwork of Misticheskaya
which you can purchase from Pics for Design
Scrapkit - Christmas Bliss from twisted summertime Designs
My Template HERE
Font of choice

~~~~~~~~~~~~~~~~~~~~~~~~~~~~~~~~~~~~~

This tutorial was written by Mizteeque on December 20th 2015
written in psp9 but any version should work
any resemblance to other works is entirely coincidental

~~~~~~~~~~~~~~~~~~~~~~~~~~~~~~~~~~~~~~


Open template, Shift & D to duplicate
close the original

make the black layer active
select all, float, defloat
copy and paste paper 8 as new layer
selections invert
hit delete on your keyboard
deselect
delete black layer

make purple layer active
repeat above steps with paper 3

Make the yellow layer active
repeat above steps with paper 7

copy and paste element 42 as new layer
resize by 60
image, mirror & flip
position to the left

copy and paste element 13 as new layer
resize by 60
image, mirror
rotate right 21
position to the left on top of fir

copy and paste element 32 as new layer
resize by 60
rotate right 6
position the left on top of the flowers

copy and paste element 45 as new layer
resize by 20
position at end of christmas tape

Now lets make our canvas a little larger
Image, Canvas size, 800 x 800

copy and paste tube as new layer
make the top red layer active,
select all, float, defloat, invert
hit delete on your tube layer
deselect
change blend mode to luminance (legacy)

paste tube again
resize to your liking (mine was 35%)
image mirror
and position to your liking 

dropshadow all layers
2,5,50,8,black

Add your name, copyright and license information
merge visible
crop and save as png

Vintage Christmas

Supplies needed:

tube of choice - I am using the beautiful artwork of Maxine Gadd
when she was selling at CDO
Supplies HERE
Font of choice

Filters - Muras Meisters - copies, 
Eye Candy 4 - Gradient glow


~~~~~~~~~~~~~~~~~~~~~~~~~~~~~~~~~~~~~

This tutorial was written by Mizteeque on December 9th 2015
written in psp9 but any version should work
any resemblance to other works is entirely coincidental

~~~~~~~~~~~~~~~~~~~~~~~~~~~~~~~~~~~~~~

Open blank canvas 700 x 700
floodfill white


copy and paste tube as new layer
muras meister - copies - wallpaper rotate, default settings
duplicate
image, gaussian blur 8
set blend mode to soft light or screen (whatever looks best to your eye)
merge down

apply mask 
merge group

Add fat white gradient glow
dropshadow 0,0,50,8, black

paste tube again
erase the bottom of the tube so it looks like the top of the tube is coming through the frame

copy and paste snowflake scatter as new layer

copy and paste wordart as new layer
resize by 70
position towards the bottom of your tag
select all, float, defloat
new raster layer
floodfill with a fore/back gradient using two colours from your tag
deselect

apply fat white gradient glow
dropshadow 2,5,50,8, black
delete original wordart layer

Add name, license and copyright information
delete white background layer
merge visible
save as png