previews

Sunday, 11 August 2019

TV - Chewing Gum for the Eyes


This tutorial was written by Mizteeque on 17th July 2019, and assumes a working knowledge of psp.
Any similarity to other works is unintentional and purely coincidental.


Supplies Needed: 
Tube of choice - I am using the beautiful artwork of Jennifer Janesko
which can be purchased from CDO
My supplies HERE
Font of choice


open blank canvas 700 x 250

c/p television, move down a little so the screen
is in the center of your canvas

freehand selection tool, feather 1, select round the 
screen of the television

c/p tube, resize to fit nicely inside the screen
invert selection, delete
change blend mode to luminance legacy

c/p grain 1, resize 30, position to your liking within the selection
delete
repeat but move to a slightly different position
c/p grain 2, resize 30, position to your liking within the selection
delete
deselect

change blend mode to dodge on all three grain layers
and lower opacity to 66
make sure grain 2 layer is active
layers - arrange - move down

hide the top 2 grain layers
copy merged 

open Animation Shop
paste as new animation

back in psp
hide bottom grain layer
unhide middle grain layer

in AS paste after current frame

back in psp
hide middle grain layer
copy merged

in AS paste after current frame
repeat twice more

back in psp
unhide top grain layer
copy merged

in AS paste after current frame

OK now we have our animation ready, go back to psp and lets build the rest of the tag

hide all layers on our canvas except the bottom one
floodfill with #d5be92

c/p film as new layer
duplicate, rotate, mirror, flip several times to cover the canvas
merge visible

using a small pixel font, type out "TV CHEWING GUM FOR THE EYES" several times 
until it reaches right across your canvas
convert to raster
position approx 1 cm up from the bottom edge
change blend mode to dodge
duplicate and position approx 1cm down from the top edge

Add name, license and copyright information

copy merged

in AS paste as new animation, duplicate until you have 6 frames
make the TV canvas active, ctrl & A to select all frames, copy
on FILM canvas, ctrl & A, paste into selected frames, 
position the TV to your liking and click once

save as gif

Delicate Elf


This tutorial was written by Mizteeque on 30th June 2019, and assumes a working knowledge of psp.
Any similarity to other works is unintentional and purely coincidental.

Supplies Needed:

Tube of choice - I am using the beautiful Forest Elf 5 by Very Many
My Scrapkit - Tenderness
Vintage Stamps from Minja's Designs
My "Delicate" wordart HERE (2nd down on the left)
Font of choice


open blank canvas 700 x 700
floodfill white

c/p stamp 1, resize 20
image effects, offset, H-55, V-40

c/p stamp 2, resize 20
image effects, offset, H55, V40

merge down
select all, float, defloat
c/p paper 2
invert
delete
keep selected
c/p close up tube as new layer
delete
keep selected
change blend mode to screen

c/p paste smaller tube as new layer
position to the left
erase the tube along the bottom left corner
deselect
d/s

delete original stamp layer

el 34, resize 80, position beneath the large 'screen' tube layer
el 19, resize 80, layers, arrange, bring to top, position along bottom of small tube
duplicate, rotate right 90, position along back of small tube,
layers, arrange, move down, repeat
el 46, resize 60, move slightly to the left behind the tube

c/p white wordart as top layer, resize 50, position to your liking
duplicate, merge down

(I duplicated again, resized 60, placed it under my tube and to the right
a little, erasing the part that was overhanging the edge of the tag)

add name, license and copyright information
delete white background layer
merge visible
crop and save as png

Alice VTR


This tutorial was written by Mizteeque on 16 June 2019, and assumes a working knowledge of psp.
Any similarity to other works is unintentional and purely coincidental.


This tutorial was written by Mizteeque on 16 June 2019, and assumes a working knowledge of psp.
Any similarity to other works is unintentional and purely coincidental.

~~~~~~~~~~~~~~~~~~~~~~~~~~~~~~~~

Supplies needed:

Tube of choice - I am using the beautiful artwork of Misticheskaya which
can be purchased from Pics For Design
Penta.com - vtr2
Font of choice


open blank canvas 700 x 250

c/p tube position so the skirt covers the entire canvas
image - rotate - 90 clockwise
effects - penta.com - vtr2 default settings
image - rotate - 90 anticlockwise

paste tube again - resize 50 - position in the middle (ensure this layer stays on top)
paste again  - resize 30 - mirror, position along left side
paste again - resize 42 - mirror, and position back to back with first tube
paste again - resize 70 - position in the gap between 1st and 2nd tube
duplicate, mirror and drag down below 3rd tube - position in top right corner

make sure 1st tube layer is at the top of the layer palette & hide it for now
merge the other tube layers together, change blend mode to luminance legacy,
duplicate
adjust - blur - gaussian blur 7 - change blend mode to screen
lower opacity on luminance layer to 54

merge visible

select all, contract by 20
dropshadow, 2,4,46, 12, black
invert selection
promote selection to layer, change blend mode to multiply
deselect

unhide tube layer
dropshadow

add name, copyright and license information
merge all
save as jpg

Like Clockwork


This tutorial was written by Mizteeque on 8th May 2019, and assumes a working knowledge of psp.
Any similarity to other works is unintentional and purely coincidental.


Supplies needed

Tube of choice - I am using 'Steampunk_23' from Very Many
which you can purchase from the store HERE
Scrapkit - Like Clockwork HERE
Stamp 2 from Minja's Designs HERE
Font of choice

Open blank canvas 700 x 700
floodfill white
c/p paper 11 
c/p stamp 2 - resize 25 - select all, float, defloat, invert
on paper layer, hit delete, deselect, delete stamp layer
duplicate pink layer, merge down
duplicate, rotate left 90
selection tool, circle, feather 30, draw out a circle from the middle of your canvas
invert selection, hit delete on your keyboard once, deselect
move down towards the bottom

c/p tube - resize to fit - blend mode luminance legacy
duplicate tube, 
adjust blur, gaussian blur 10, 
blend mode screen, lower opacity to 75
dropshadow original tube layer

Dont forget to dropshadow elements as you go along

el 45 - resize 55 - position along bottom of tube
el 39 - resize 40 - position along bottom of tube in front of flowers
el 38 - resize 60 - position centrally behind tube
el 49 - resize 30 - position behind the cogs to the left, duplicate, mirror and move down a little
el 57 - resize 30 - position bottom right, place on top of cogs, behind tubes back to the right
duplicate, layers - arrange, bring to top, mirror and position bottom right of tag
el 67 - resize 30 - position bottom right
el 72 - resize 20 - position behind car
el 12 - resize 25 - position bottom left

add any other elements you wish

add name, copyright and license information
delete white background layer
merge visible
crop and save as png

add name, license and copyright information
delete white background
merge visible
crop and save as png

Thursday, 1 August 2019

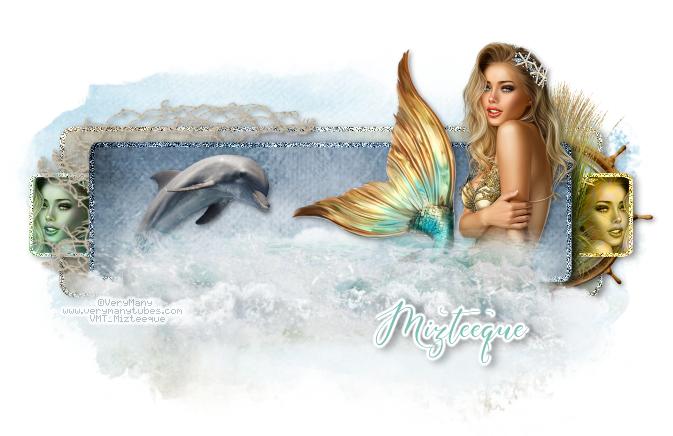
Mermaid

This tutorial was written by Mizteeque on 20th June 2019, and assumes a working knowledge of psp.
Any similarity to other works is unintentional and purely coincidental.

Supplies needed:

tube of choice - I am using the beautiful mermaid4 from VeryMany
which can be purchased from the store HERE
my supplies HERE
my scrapkit -Coastal HERE
Mask of choice
font of choice


Open template from supplies
shift & D to duplicate and close original

c/p paper 12 just above bg layer
apply mask
merge group

layer 1 - select all, float, defloat, c/p paper 16
invert - delete - invert - selections, modify, select selection borders
inside 5
add noise - gaussian 86 - deselect

Layer 2 - repeat using paper 18

Layer 3 - repeat using paper 8

elements 62 & 63
element 64 - resize 60
position along bottom of top layer to your liking

element 31 - resize 30 - rotate left 90
drag down layer palette to just under the top paper layer
position to the left - dropshadow

element 51 - resize 30 - position to the right 

element 30 - resize 50 - erase one of the dolphins
position to your liking between the water layers

c/p tube - resize as necessary
using your freehand selection tool, feather around 20/25
select along the bottom of your tube and hit delete a few times
deselect

duplicate tube twice - mirror one
drag then both down to just above the middle paper layer
on paper layer - select all, float, defloat, contract by 4, invert
position tubes to your liking within the selection, hit delete on each one
deselect
change blend mode to luminance legacy on both.

frame 2 - resize 30 - position just above bottom paper layer
to the right behind the grass

add name, license and copyright information
delete white bg layer
merge visible
crop and save as png