Showing posts with label Animated. Show all posts

Sunday, 11 August 2019

TV - Chewing Gum for the Eyes


This tutorial was written by Mizteeque on 17th July 2019, and assumes a working knowledge of psp.
Any similarity to other works is unintentional and purely coincidental.

•


Supplies Needed: 
Tube of choice - I am using the beautiful artwork of Jennifer Janesko
which can be purchased from CDO
My supplies HERE
Font of choice

•

open blank canvas 700 x 250

c/p television, move down a little so the screen
is in the center of your canvas

freehand selection tool, feather 1, select round the 
screen of the television

c/p tube, resize to fit nicely inside the screen
invert selection, delete
change blend mode to luminance legacy

c/p grain 1, resize 30, position to your liking within the selection
delete
repeat but move to a slightly different position
c/p grain 2, resize 30, position to your liking within the selection
delete
deselect

change blend mode to dodge on all three grain layers
and lower opacity to 66
make sure grain 2 layer is active
layers - arrange - move down

hide the top 2 grain layers
copy merged 

open Animation Shop
paste as new animation

back in psp
hide bottom grain layer
unhide middle grain layer

in AS paste after current frame

back in psp
hide middle grain layer
copy merged

in AS paste after current frame
repeat twice more

back in psp
unhide top grain layer
copy merged

in AS paste after current frame

OK now we have our animation ready, go back to psp and lets build the rest of the tag

hide all layers on our canvas except the bottom one
floodfill with #d5be92

c/p film as new layer
duplicate, rotate, mirror, flip several times to cover the canvas
merge visible

using a small pixel font, type out "TV CHEWING GUM FOR THE EYES" several times 
until it reaches right across your canvas
convert to raster
position approx 1 cm up from the bottom edge
change blend mode to dodge
duplicate and position approx 1cm down from the top edge

Add name, license and copyright information

copy merged

in AS paste as new animation, duplicate until you have 6 frames
make the TV canvas active, ctrl & A to select all frames, copy
on FILM canvas, ctrl & A, paste into selected frames, 
position the TV to your liking and click once

save as gif

Saturday, 10 November 2018

Christmas Stocking!

Supplies needed:

Tube of choice - a leggy tube wearing stockings is best for this tut
I am using the gorgeous artwork of Barbara Jensen
Scrapkit - Silver Bells from Pink Paradox Productions
Mask #153 HERE
Font of choice
Supplies HERE
Animation Shop

~~~~~~~~~~~~~~~~~~~~~~~~~~~~~~~~~~~~

This tutorial was written by Mizteeque on 10th November 2018 and assumes a working knowledge of psp
Written using psp9 but other versions should work just as well
Any similarity to other works is unintentional and purely coincidental

~~~~~~~~~~~~~~~~~~~~~~~~~~~~~~~~~~~~

open blank canvas 700 x 700
floodfill white

c/p paper 18
apply mask
merge group

c/p paper 39
resize 50

c/p frame 6
resize 50
move paper layer up a little so you can see some
of the snow on the ground
on frame layer, magic wand, mode add, tolerance & feather 0
click inside the frame, expand by 3, invert
on paper layer, delete
deselect

hide frame layer
copy merged

open Animation shop
paste as new animation
duplicate frame until you have 30 frames

open snow animation
edit - select all
edit - copy

back to your canvas
edit - select all
edit - paste into selected frame

position so the snow is in the circle
and click once

Now it may get complicated so concentrate and stay with me here

on the snow animation
click on the first frame
hold down shift and click on the 10th frame
edit - cut
now click on the last frame (20)
edit - paste after current frame
edit - select all
edit - copy
back to your canvas
edit - paste into selected frame
position in the circle but slightly more to the left
click once

back to the snow animation
repeat above steps
until you paste onto your canvas, this time move it 
slightly to the right
click once

Now leave this canvas here, while we go back and finish our tag in psp
You can close the snow animation now, without saving

Now back to psp

unhide frame
c/p element 66 under frame, resize 15
image effects - offset - h 81, v-108, custom & transparent checked
duplicate and move across to the left side so the 
right hand edges match up to make a whole fence
merge down

c/p tube as new layer above frame
resize 70
image effects - offset - h-120, v0

selection tool - circle, feather 30
draw out a circle from the little fingernail
on the right hand out to the outer edge of the frame
invert
hit delete on tube layer 2 or 3 times
deselect

c/p element 57, resize 40, position at bottom of tube 
c/p element 52, resize 40, position to the right of the bucket
c/p element 63, resize 60, position on left, drag under the bucket layer
c/p elements 86, 87 & 99, resize 20,
position to your liking across the top to hide
any harsh straight edges of the tube still showing
c/p word art

make sure all your elements have a dropshadow and 
are positioned to your liking

add your name, copyright and license information

now hide the white background, mask & paper layer
copy merged

now back to AS
paste as new animation
duplicate until you have 30 frames
edit - select all
edit - copy

on your canvas that we left here earlier
edit - select all
edit - paste into selected frame
line it up so the inner edge of the frame
is lined up with the edge of the circle
click once

save as gif

Thursday, 30 August 2018

Queen of Spades


Supplies needed: 
Tube of choice -  I am using the fabulous artwork of Misticheskaya
which can be purchased from Pics for Design
My Template HERE
Font of choice 
Filters - Penta.com, Xenofex2

~~~~~~~~~~~~~~~~~~~~~~~~~~~~~~~~~~~~~

This tutorial was written by Mizteeque on 30th August 2018 and assumes a working knowledge of psp
Written using psp9 but other versions should work just as well
Any similarity to other works is unintentional and purely coincidental

~~~~~~~~~~~~~~~~~~~~~~~~~~~~~~~~~~~~~

Open template

Frame layer active
magic wand, feather 0, mode add
select inside numbers 1, 3, 5 & 7
expand by 1
new raster layer
floodfill with a gradient made from 2 colors from your tube
linear, angle 45, repeats 2
deselect
drag below the frame layer
name this layer 1

Back to frame layer
this time select inside numbers 2, 4 & 6
expand by 1
floodfill with same gradient but change the angle to 0
deselect
drag below frame layer
name this layer dots

Effects - Penta.com - color dot
default settings but change distance to 4

back to frame layer
magic wand, same settings as before, click inside 
all the border parts 
expand by 1
new raster layer
floodfill with a very dark color that matches your tag
deselect
drag below frame layer
name this layer border

now you can delete the numbers layer

copy and paste tube as new layer
duplicate
make sure one is just above layer 1
and the other is just above the dots layer

make layer 1 active
select all, float, defloat, invert
hit delete on 1st tube layer
deselect
dropshadow tube

make dots layer active
select all, float, defloat, invert
hit delete on 2nd tube layer
deselect
change the blend mode to screen

Frame layer
select all, float, defloat,
new raster layer, 
floodfill with a light color that matches your tag
deselect
delete original frame layer

Border Layer
duplicate twice
on bottom one, select all, float, defloat
effects - xenofex2 - constellation
star size 2
star variation 3
edge density 1
overall density 1
overdrive 100
twinkle 100
rotation 45
keep original image

repeat constellation on the other two border layers
ensure you hit random seed on each one
deselect

add name, copyright & license information
hide top 2 border layers
copy merged

Open Animation Shop (AS)
paste as new animation

back to psp
close bottom border layer
open middle border layer
copy merged

back in AS
paste after current frame

repeat for 3rd border layer

save as gif


Wednesday, 13 June 2018

Chasing Rainbows (animated)


This tutorial was written by Mizteeque on 13th June 2018 and assumes a working knowledge of psp
Written using psp9 but other versions should work just as well
Any similarity to other works is unintentional and purely coincidental
~~~~~~~~~~~~~~~~~~~~~~~~~~~~~~~~~~~~~~~~


Supplies needed: 


Tube of choice, I am using a FTU tube from Zindy 
which you can download from her site HERE
Animation shop
My supplies HERE

~~~~~~~~~~~~~~~~~~~~~~~~~~~~

NOTE:  This is an animated tutorial


open blank canvas 700 x 700
floodfill white

text tool - kaleidoscopic mind
size 400
color black
type an f
objects - align in center
convert to raster

select all, float, defloat
new raster layer
floodfill with rainbow pastel gradient
linear, angle and repeats 0

new raster layer
floodfill again but change angle to 25
repeat but change angle to 50
continue repeat increasing angle by 25 each time
until you get to angle 325 (you should end up with 13 gradient layers)

expand selection by 2
back on black layer
floodfill black again
deselect
dropshadow 0,0,40,13,black

copy and paste tube as new layer, bring to top
resize so it fits inside the circle
a misted or soft edged tube is best for this
change blend mode to luminance legacy
lower opacity a little if you think it needs it

c/p wordart as new layer

add your name, copyright and license information

ok now it gets interesting!

close all layers except white background, black outline, bottom gradient and tube
copy merged

open AS, paste as new animation
back in PSP

close bottom gradient
open next one up
copy merged

back to AS, paste after current frame

back to PSP

repeat until all the gradient layers have been copied over

crop and save as gif

Tuesday, 26 September 2017

Remember - forum set


This tutorial was written by Mizteeque on 1st August 2017  and assumes a working knowledge of psp
Written using psp9 but other versions should work just as well
Any similarity to other works is unintentional and purely coincidental
~~~~~~~~~~~~~~~~~~~~~~~~~~~~~~~~~~~~~~~~


Supplies needed:

Tube of choice (im using one holding a stringed instrument)
I am using the stunning artwork of Enys Guerrero which can be purchased from CDO
My Srapkit Memory Maker
Supplies HERE
Font of choice

~~~~~~~~~~~~~~~~~~~~~~~~~~~~~~~~~


open blank canvas 650 x 250

c/p paper 5 
drag it down and to the left so the 
light part at the top of the paper is
showing

c/p element 37
resize 30
colorize hue 22, Saturation 101
position bottom left corner
duplicate, flip
d/s both
merge down

c/p premade cluster
position bottom left corner
under element 37
so the edges line up with the edge of the tag

c/p tube
position to the right
duplicate
adjust, blur, gaussian blur 8
change blend mode to screen, lower opacity to 70
d/s original tube

c/p wordart 3 & 6
resize both by 30
position one under the cluster at the top, rotate left slightly
position the other one above the cluster but under the 
corner element at the bottom, rotate right slightly

merge visible

new raster layer
floodfill dark brown
select all, contract by 2
floodfill beige
contract by 2
floodfill dark brown
contract by 2
delete
deselect

add copyright & license number
merge visible

Now to animate

If you are not using the same tube as me, then choose a part 
of your tube that you can animate - strands of hair, jewellery

freehand selection tool, feather 0, point to point, mode Add
zoom in and select round the strings on the violin

adjust, add noise 40, uniform, monchrome
deselect
copy

Open animation shop
paste as new animation

back to psp
hit the undo button twice
repeat the noise but change to 41
deselect
copy
in AS paste after current frame

repeat twice more but change noise to 42 & 43

save as gif


Here are some more examples made by my lovely members at Taggers Inn


Tuesday, 4 July 2017

Take a Picture


Supplies needed:

Tube of choice - I am using the stunning artwork of Stan Dudin
which is an exclusive over at Pics for design - any tube with a camera should do though
my scrapkit Hollywood
Supplies HERE
Font of choice
Animation Shop

~~~~~~~~~~~~~~~~~~~~~~~~~~~~~~~~~~~~~~~~
This tutorial was written by Mizteeque on 17th June 2017  and assumes a working knowledge of psp
Written using psp9 but other versions should work just as well
Any similarity to other works is unintentional and purely coincidental
~~~~~~~~~~~~~~~~~~~~~~~~~~~~~~~~~~~~~~~~


open blank canvas 700 x 700
floodfill white

new raster layer
floodfill with a fore/back gradient 
made from 2 colors from your tube
sunburst, repeats 3
apply mask
merge group
resize - aspect ratio unchecked
width 90, height 110

c/p phone frame as new layer
magic wand, feather 0, click inside phone
expand 3
floodfill with same gradient as before
deselect

c/p tube as new layer
resize to fit nicely inside phone frame
erase any that is outside of the phone frame
dropshadow tube and phone frame
merge phone, tube and gradient together

c/p spotlight as new layer
resize 15
position over flash on camera

c/p element 14
resize 50

magic wand, feather 0,
click inside one of the frames of the film strip
expand by 2
c/p tube
resize to fit
position to your liking, invert, delete
deselect

repeat for the next two frames of the film strip

merge film strip and tube layers together
dropshadow
rotate left 5
position along bottom of phone

c/p element 19 as new layer
resize by 70
position bottom right corner, under film strip

c/p element 20
resize 25
rotate right 5
position bottom right under light legs

c/p element 36
resize 40
duplicate a couple of times
and position just above mask layer to your liking

C/P wordart

add name, license and copyright information

copy merged

Open Animation Shop
paste as new animation

back in psp hide the spotlight layer
copy merged

in AS paste after current frame
change frame properties to 150 on this frame only
save as gif

Sunday, 26 March 2017

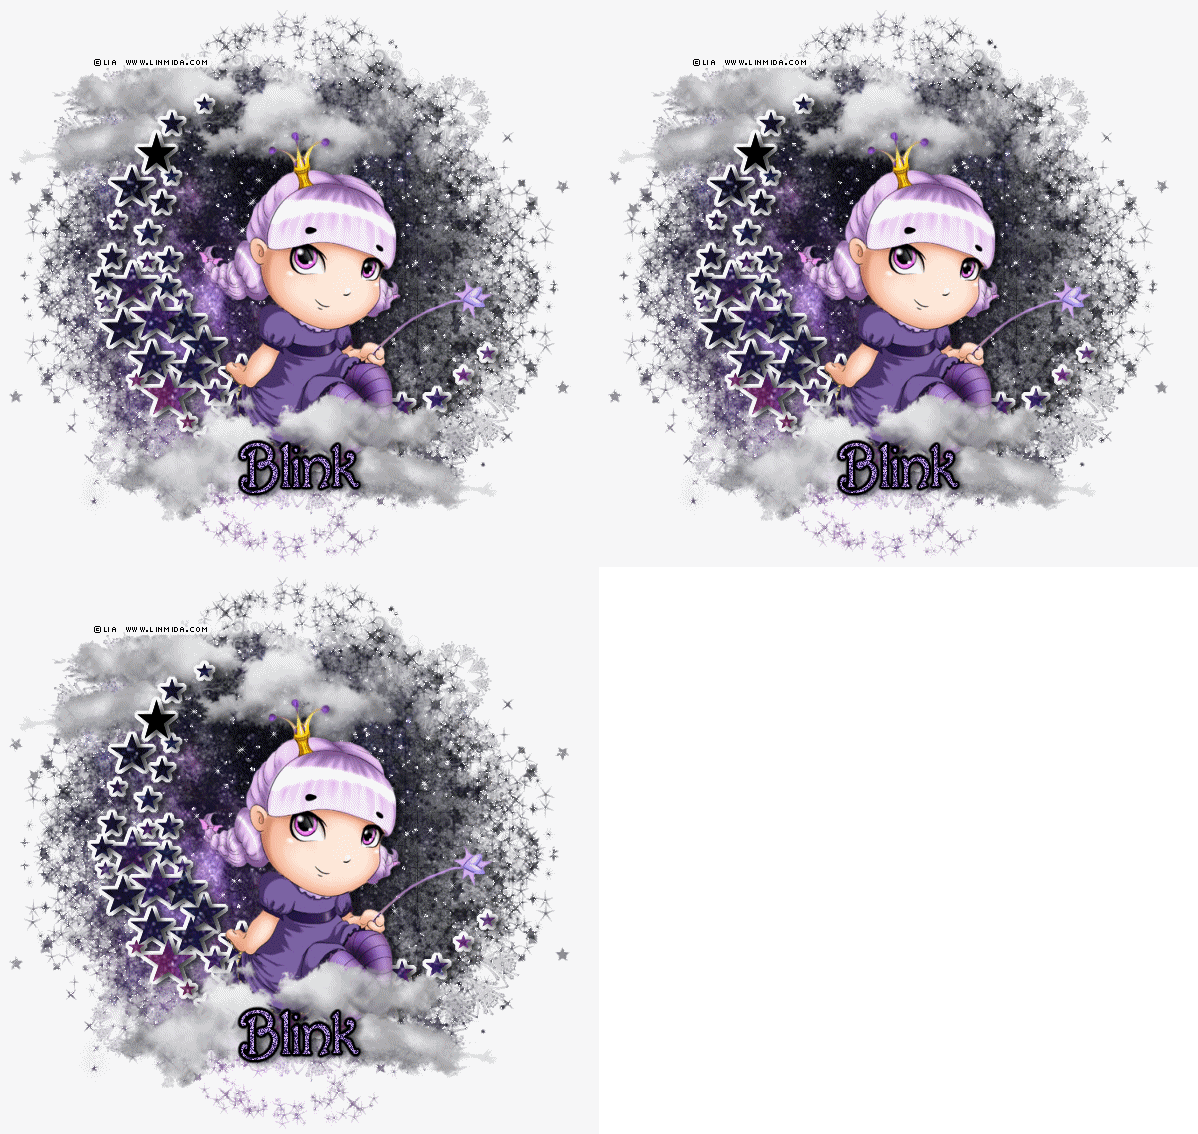
Starry Night


Supplies needed:

Tube of choice - I am using This little cutie from Laguna over at Pics for Design
You must have a license to use the same tube.
My Scrapkit Starry Night
My mask 153 HERE
Font of choice
Xenofex 2 - Constellation

~~~~~~~~~~~~~~~~~~~~~~~~~~~~~~~~~~~~~~~~~

This tutorial was written by Mizteeque on 6th March 2017  and assumes a working knowledge of psp
Written using psp9 but other versions should work just as well
Any similarity to other works is unintentional and purely coincidental
~~~~~~~~~~~~~~~~~~~~~~~~~~~~~~~~~~~~~~~~~


Place mask in your masks folder
open supplies in PSP

open blank canvas 700 x 700
floodfill white

copy and paste paper 5 as new layer
apply Miz_mask 153
merge group

copy and paste element 28
select all, float, defloat,
expand selection by 4
new raster layer
floodfill white
deselect
drag white layer below the star crescent layer
dropshadow 2,5,50,8,black

copy and paste tube as new layer
resize to fit nicely on your star crescent
dropshadow

copy and paste element 37 as new layer
resize by 50
position along bottom of star crescent
duplicate
position top left of star crescent 
and drag below it

Add name, copyright and license information

Now duplicate the mask layer twice
on the original mask layer
xenofex 2 - constellation
Star size 2
star variation 14
edge star density 7
overall star density 0
overdrive 100
twinkle amount 75
rotation 45
keep original image - checked

repeat for the two duplicated mask layers
ensuring you hit the Random seed button each time

hide the top two mask layers
copy merged

Open animation shop (as)
paste as new animation

back in psp, 
hide star crescent bottom layer
unhide middle one
copy merged

in AS, paste after current frame

back in psp, 
hide middle star crescent layer
unhide top one
copy merged

in AS, paste after current frame

save as gif.


Here are some more examples made by the members of my forum 

Deeva

Marie


Lisa


Bee


Monday, 6 February 2017

Alfs


Supplies Needed:


Tube of choice - You will need a large tube for this to work
I am using the beautiful artwork of Alfadesire
This particular tube is a free download from PFD 
but you will still need a license number to use it
Eye Candy 4 
Font of choice
Animation Shop

~~~~~~~~~~~~~~~~~~~~~~~~~~~~~~~~~~~~~~~~~

This tutorial was written by Mizteeque on 15th January 2017  and assumes a working knowledge of psp
Written using psp9 but other versions should work just as well
Any similarity to other works is unintentional and purely coincidental
~~~~~~~~~~~~~~~~~~~~~~~~~~~~~~~~~~~~~~~~~


open blank canvas 700 x 250

copy and paste tube as new layer

Muras meister - copies - wallpaper (rotate) default settings
adjust blur - motion blur, angle 61, strength 100
repeat blur
duplicate layer

On the duplicated layer
Alf's power toys - dartboard
concentric divisions 10
radial divisions 2
all other settings 0


move the layer down until the center line
is no longer visible along the bottom of the tag


magic wand, feather 0, mode Add(shift)
click inside each black circle
hit delete
deselect

Image, mirror

Magic wand, click inside the empty parts
(you may have to hide the bottom blurred layer)
expand selection by 3
new raster layer
floodfill with a colour from your tube
contract by 3
hit delete
deselect
add noise,  uniform, 100, monochrome checked

Magic wand again, click inside the empty parts
copy and paste tube a couple of times and position one to the left and one to the right
hit delete
deselect
Merge the tube layers together
change blend mode to screen
drag below your 'noise' layer
duplicate twice

On 1 screen layer
eye candy4 - hsb noise 25, 30,40,0,42,42, smooth lumps


On 2nd screen layer
repeat hsb noise, but hit random seed button

On 3rd screen layer
repeat hsb noise, hit random seed again

paste tube again, resize if necessary
dropshadow

New raster layer
floodfill with colour you used for our noised border
select all
contract by 2
delete
add same noise as before

Add name, copyright and license information

Hide the top 2 screen layers
copy merged

Open Animation Shop
paste as new animation

back in psp, hide the bottom screen layer
unhide the middle one
copy merged

In AS paste after current frame

repeat for the last screen layer

save as gif

Sunday, 1 January 2017

Sunlight


Tube of choice - I am using the beautiful artwork of Zindy
which can be purchased from her store HERE
(note: I neglected to save a copy of my own tag, the example above was made by one of my forum members)
Nature Image HERE
Font of choice
PSP & Animation Shop

~~~~~~~~~~~~~~~~~~~~~~~~~~~~~~~

This tutorial was written by Mizteeque on 28th October 2016 and assumes a working knowledge of psp
Written using psp9 but other versions should work just as well
Any similarity to other works is unintentional and purely coincidental
~~~~~~~~~~~~~~~~~~~~~~~~~~~~~~~


Note:  This tutorial is an animated one. 
If you do not wish to animate then please follow the instructions in blue


Open nature image

Promote background layer to raster
duplicate layer 4 times 

Rename layers from bottom to top 1 - 5

hide layers 2, 3, 4 & 5

On layer 1
effects, illumination effects, Sunburst
color, white
brightness 100
horizontal 3
vertical 12
Rays - density 50, Brightness 50
circles brightness 100

Hide layer 1, 
On layer 2
Sunburst
brightness 76
horizontal 10
vertical 18
Rays - density 26, Brightness 17
circles brightness 75

Hide layer 2
On layer 3
Sunburst
brightness 61
horizontal 18
vertical 24
Rays - density 20, Brightness 17
circles brightness 50

Hide layer 3
On layer 4
Sunburst
brightness 50
horizontal 8
vertical 18
Rays - density 20, Brightness 17
circles brightness 40

Hide layer 4
On layer 5
Sunburst
brightness 42
horizontal 2
vertical 11
Rays - density 20, Brightness 10
circles brightness 40

Hide layers 2 - 5 again
copy merged

Open animation shop
paste as new animation

In PSP, Hide layer 1, open layer 2, copy merged

In AS, Paste after current frame 
make frame 1 active
effects, insert image transition

Choose Fade from drop down box
Animation frame - checked on both sides of preview pane
transition length - 0.5 secs
frames per second - 11 fps

Back to PSP, hide layer 2, open layer 3, copy merged

In AS, make last frame active (7), paste after current frame, 
Make frame 7 active, insert image transition again

Back to PSP, hide layer 3, open layer 4, copy merged

In AS, make last frame (13) active, paste after current frame,
Make rame 13 active, insert image transition again

Back to PSP, hidge layer 4, open layer 5, copy merged

In AS, make last frame (19) active, paste after current frame
Make layer 19 active, insert image transition again

Now goto Edit, select all, or hit crtl & A on your keyboard
copy
Now make frame 25 active, paste after current frame
Animation, reverse frames

Back in PSP

paste your tube as new layer
resize so it fits nicely in the middle of the track
I colorized mine to suit the tag
dropshadow

Add your name, copyright and license information

create new raster layer
floodfill with colour of choice
select all, contract by 3
hit delete on your keyboard
deselect


(if not animating then here is where you will merge all and save as jpg)

hide layers 1 - 5
copy merged

In AS, paste as new animation
duplicate to 50 frames
select all, copy

select all on your sunburst animation, paste into selected frames
dont move your mouse, just click and it should paste it exactly 
where you need it to

Save as gif

Another example from one of my forum members Deeva


Monday, 8 February 2016

Rock the music


Supplies needed:


Tube of choice, I am using the artwork of Elias Chatzoudis which 
you can purchase from his store HERE
Scrapkit - Music of the Night from Jens Sweet Temptations
Mask of choice 
Font of choice

My supplies HERE


~~~~~~~~~~~~~~~~~~~~~~~~~~~~~~~~~~~~~~~~~

This tutorial was written by Mizteeque on 14th January 2016
Written using psp9 but other versions should work just as well
Any similarity to other works is unintentional and purely coincidental


Note:  This tut has instructions for both animated and non animated versions

Open blank canvas 700 x 700
floodfill white

c/p paper 7 
apply mask
merge group
resize by 85

c/p Notes1
position at bottom of mask layer

c/p speaker 1
resize by 70

c/p piano
rotate left 25
position at bottom of speaker, but ensure you dont cover the notes1

c/p notes
position just above speaker

c/p speaker 2
resize by 70
position to the left
duplicate
image, mirror

c/p music cross
resize by 50
rotate left 25
position bottom left corner of left speaker

c/p headphones
resize by 50
rotate right 25
position top right corner of right speaker

c/p tube as new layer
resize to fit

dropshadow all layers except mask
2,5,50,8,black

If you are NOT animating your tag then 

add name, license and copyright information
delete white background layer
merge visible, crop and save as png.


If you ARE animating your tag...

Hide your tube, just so we can see what we are doing

Make large center speaker active
duplicate
selection tool, circle, feather 0
draw a circle out from middle of speaker to the outside edge of the black edge
effects, distortion effects, punch, strength 10
duplicate
repeat punch
deselect

unhide tube

Add name, license and copyright information

hide top 2 speaker layers
copy merged

Open animation shop
paste as new animation

back in psp unhide middle speaker layer
copy merged

In AS paste after current frame

back in psp unhide top speaker layer
copy merged

In AS paste after current frame

Select all frames (ctrl & A)
copy
click on frame 3 
paste after current frame

click on frame 6
paste after current frame

click on frame 9
paste after current frame

You should now have 12 frames

Open notesani
select all, 
copy

Make tag active, select all, 
paste into selected frames
click to position to your liking

play animation to make sure you like what you see
if not just hit undo and redo

save as gif


Tuesday, 19 January 2016

Diagonal Lines


Supplies needed

Tube of choice - I am using the very cute artwork of Laguna
which can be purchased from Pics For Design
Filters :
Muras Meister - copies
Carolaine & Sensibility
Eye Candy 4 - Gradient Glow
You can find all the filters HERE 


~~~~~~~~~~~~~~~~~~~~~~~~~~~~~~~~~~~~~~~~~~~
This tutorial was written by Mizteeque on 19th January 2016
written in psp9 but any version should work
any resemblance to other works is entirely coincidental
~~~~~~~~~~~~~~~~~~~~~~~~~~~~~~~~~~~~~~~~~~~


Open blank canvas 700 x 700
floodfill with gradient made from two colors from your tube
linear, angle 45, repeats 3

copy and paste tube as new layer
resize if necessary
apply muras meister copies, wallpaper rotate, default settings

Apply Carolaine & Sensibility filter 
CS-BRectangles
control 0 - 17
control 1 - 18
control 2 - 164
control 3 - 128


Selction tool, custom selection
top 0, left 0, right 700, bottom 250
Image, crop to selection

duplicate the C&S layer 3 times for a total of 4 
rename them from bottom to top 1,2,3,4
hide  2,3 & 4, 
working on the layer 1

selection tool, rectangle, feather 0, mode Add
select around several of the squares randomly
across the tag

apply C&S CS-DLines
control 0 - 40
control 1 - 5
change blend mode to Lumincance Legacy


unhide layer 2
repeat CS-DLines but change control 1 to 8
change blend mode to Lumincance Legacy

unhide layer 3
repeat CS-DLines but change control 1 to 11
change blend mode to Lumincance Legacy

unhide layer 4
repeat CS-DLines but change control 1 to 14
change blend mode to Lumincance Legacy

deselect

copy and paste tube as new layer
resize and position to your liking
dropshadow

duplicate bottom gradient layer
layers, arrange, bring to top
select all, contract by 4
hit delete on your keyboard

Add name
I used Typography Caps for the Initial and Close to you for the remainder of the name
I then applied a gradient glow and dropshadow
Add license & copyright information

hide layers 2,3 & 4 again

Copy merged
Open animation shop
paste as new animation 

back to psp
hide 1, unhide 2
copy merged

back to AS
paste after current frame

repeat for layers 3 & 4

make sure your arrow is selected in AS
hold down the shift key and click on frames 2 & 3
copy
now click on frame 4 
paste after current frame
click on Animation on the top toolbar and click on reverse frames

now when you play your animation the diagonal lines should look 
like they are going in and out

save as gif